Instruction
1
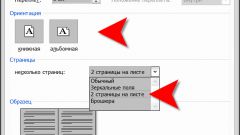
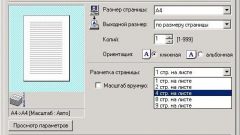
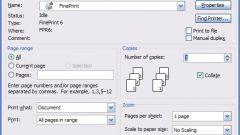
Use the printer install. This is the easiest way. Click the "Print" button or select from the drop down menu Office button" in the upper left corner of the text editor window. In the dialog box under "Scale" from the drop down list to select the desired value in the field "Number of pages per sheet" (2 pages). After that, the font size, printed, automatically reduced, the plate is divided into two parts. The text in the main document will remain unchanged.
2
To achieve the same result when printing and in the document, use a text editor. Change the page format of the document from portrait to landscape. To do this, go to the tab "page Layout", under "page layout" select "Orientation". From the drop-down list, select "Landscape."
3
Place the text on the page in two columns. To do this, with the tab "page Layout" from the same Settings page, select "Speakers". Using the drop-down list, select the value "Two". Go to the View tab, in the section "Show or hide the" install marker opposite point "the Line". Adjust the ruler to the desired size of the document fields and column spacing.
4
Go to the Home tab. Select the text or text fragment with the mouse, Ctrl, Shift and arrow keys or the tab "Edit" choose "Select all". Reduce the font size to the next page was entirely in the right column. To do this, see "Font" on the same tab select the appropriate value.
5
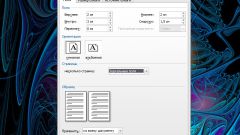
If the toolbar you can't find the right field, click the right mouse button in the document from the drop-down menu, select "Font" - this will bring up a dialog box. In the opened window go to the Font tab, under "Size" set the desired value, close the window.
6
To further customize the document, use the options editor to set the desired spacing between letters or lines. To do this, choose the corresponding options in the menu window "Font" - tab "Interval" window "Paragraph" tab "Indents and spacing".