You will need
- - screwdriver;
- - wire (15-20cm);
- - soldering iron;
- - plastic clamp-tie;
- - duct tape.
Instruction
1
Get rid of the existing faulty relay. First we need to remove the glove box. The next step – Unscrew with a screwdriver the screw that secures the bracket of the glove box.
2
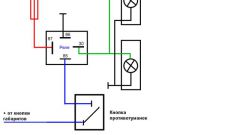
Now disconnect from relay turns the electrical connector, Unscrew the screws that secure the bracket turns the relay. Then remove the bracket together with the old relay turns. After this you need to remove from the bracket turns the relay and proceed with the installation of electronic relays, which is the reverse of the removal sequence.
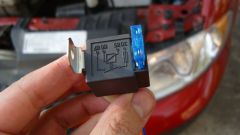
3
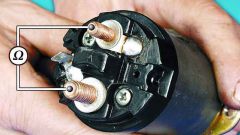
Remember, externally, in addition to having a plastic case, electronic relay is different from the "native" presence of the fourth contact connecting to ground (body) of the car. For this you need to take the drive (it is recommended to give preference to black color), which length is from 15 to 20 inches, and one side of the solder tip to connect together with the relay contact.
4
The petal under the nut (hole diameter 6.5-7 mm, because to mount it you need to place mount relay still) take the other side, and then peresoedinenie all the tips with the actuators relay with the old with the new.
5
Since the electronic relay is characterized by the presence of the plastic housing, securing him a regular place prevent the thickness of the bracket. This also contributes an extra petal from the fourth contact from the body of the actuator. For this reason, the method of attachment you need to invent your own. So, for example, to fix this can be so: by means of a tie strap, plastic, for fastening cables and wires. Well kept, in addition to replacement does not need to disassemble the entire panel.
Note
Don't forget to be insulated with electrical tape or cambrica tips because there are options when present on the tips no insulation.
Useful advice
When the health of all parts of the new relay and proper installation of the electronic device, the system should immediately start working, without the need for adjustment. Otherwise, there were errors in the installation process.