You will need
- - Arduino;
- - RC522 RFID reader;
- wireless RFID label or regular metro ticket/land transport;
- computer;
- - connecting wires.
Instruction
1
Module RFID RC522 is executed on the chip MFRC522 NXP company. This chip provides two-way wireless (up to 6 cm) communication at 13.56 MHz. RFID is an abbreviation for "Radio Frequency IDentification" and is translated as "radio frequency identification".
Chip MFRC522 supports the following interfaces:
- SPI (Serial Peripheral Interface, a serial interface for connection of peripheral devices), provides data transfer speeds up to 10 Mbps;
- two-wire I2C interface, speed up to 3400 kbit / s in High-speed mode, up to 400 kbit / s in Fast mode;
- serial UART (similar to RS232), the speed 1228,8 kbit / s.
With this module you can record and read different RFID tags: keyfobs for intercoms, plastic cards and metro tickets and ground transportation, as well as the increasingly popular NFC tags.

2
Connect the module RFID RC522 to Arduino via SPI interface according to the above scheme.
The module power supply is provided with voltage from 2.5 to 3.3 V. the Rest of the findings connected to Arduino like this:
RST - D9;
SDA (SS) - D10;
MOSI - D11;
MISO - D12;
SCK - D13.
Don't forget that Arduino has a special connector ICSP to work on the SPI interface. Its Pinout is also shown in the illustration. You can connect the insights RST, SCK, MISO, MOSI and GND of the module RC522 to the ICSP connector on Arduino.

3
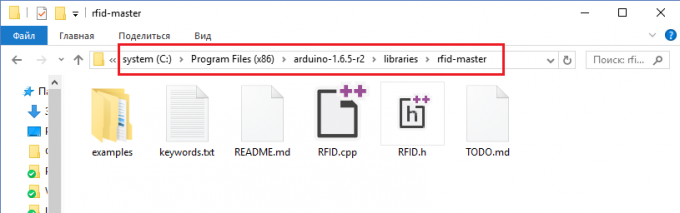
Chip MFRC522 has quite extensive functionality. To get acquainted with all the possibilities by examining her passport (datasheet). We are to explore the possibilities of this device will use one of ready libraries written for Arduino work with the RC522. At the end of the article you can find a link to one of the libraries, which is called rfid. Download it and unzip in the directory %IDE Arduino%/libraries/.
4
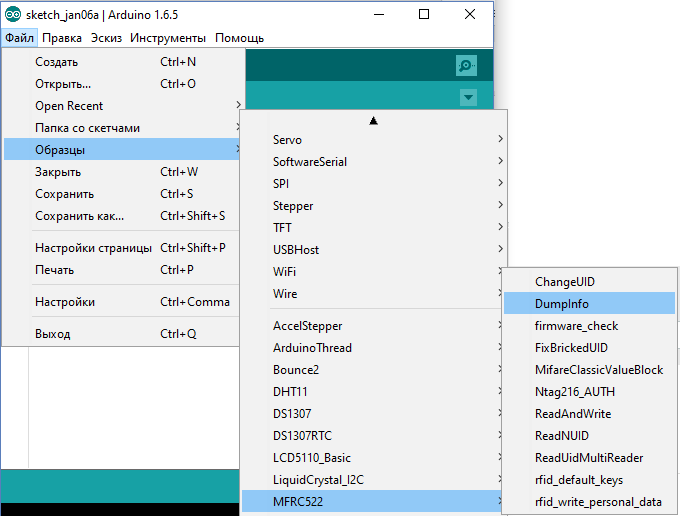
Now let's open the sketch from the examples: File -> Samples -> MFRC522 -> DumpInfo and upload it to the Arduino memory. This sketch defines the type applied to the device reader and reads data recorded on RFID tag or card, and then outputs them to the serial port. The text of the sketch fairly well commented by the developers of the library, "rfid", as well as lots of useful information on working with the library contained in the file MFRC522.h.
5
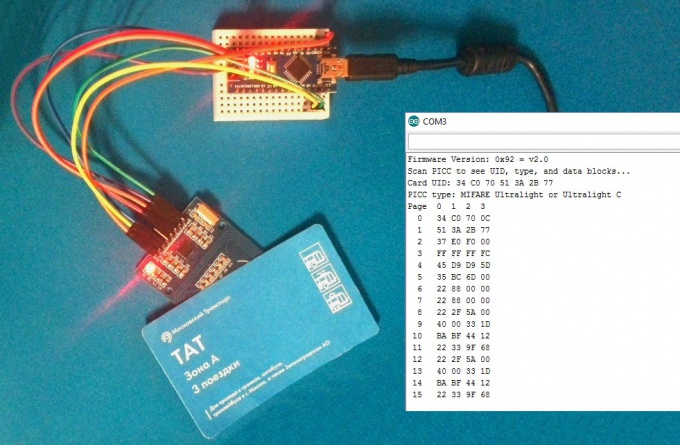
Start monitor serial port key combination Ctrl+Shift+M, using the menu Tools or by clicking on the magnifying glass. Now attach to the reader metro ticket or any other RFID tag. Monitor serial port will show the data recorded on the RFID tag or ticket. For example, in my case is an encrypted, unique ticket number, purchase date, expiration date, number of remaining trips, and service information. We will examine in a future article, what is recorded on maps of the metro and surface transport.
Note
Yes, using the module of the RFID-RC522 to write the data on the ticket of the metro. But make no mistake, each card has a read-only counter of write cycles, so that the "add" travel to myself on the subway will not work - it will be immediately detected and the card will be rejected But the use of metro tickets to record them on small amounts of data - 1 to 4 - KB. And applications that are limited only by your imagination.