You will need
- - Arduino;
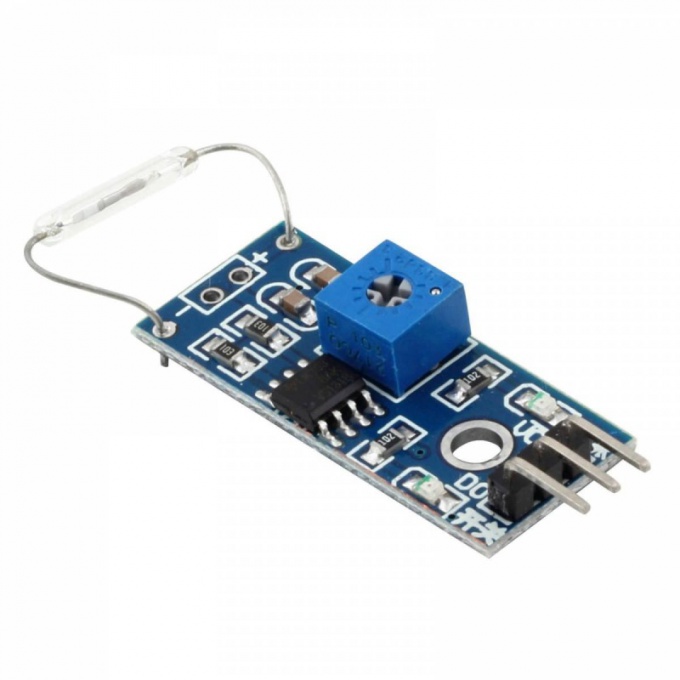
- - module with a reed switch or just the switch;
- - the permanent magnet;
- computer.
Instruction
1
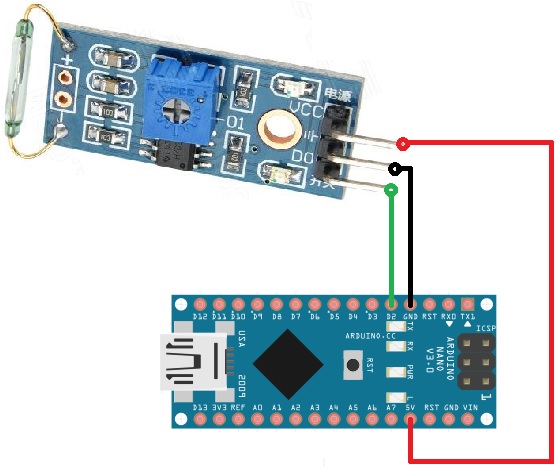
Connect the module with a reed switch to the Arduino via the above scheme. Powered from 5 V or 3.3 V. the Signal connect to digital pin D2.
Module with reed switch contains a variable resistor of 10 ohms. This resistor can be set the switching threshold of the reed switch and thus to adjust the sensitivity. The module contains a comparator LM393 to exclude false positives of the magnetic sensor.
Module with reed switch contains a variable resistor of 10 ohms. This resistor can be set the switching threshold of the reed switch and thus to adjust the sensitivity. The module contains a comparator LM393 to exclude false positives of the magnetic sensor.
2
Write a sketch of the processing operation of the reed switch. Everything is simple. Specify the number of the pin to which you connected the module output is "2" and turn it to "wiretap". Activate pull up resistor on the leg of "2". Set pin 13 as an output. Included in the work of the serial port at 9600 baud. And then every 20 msec, read the testimony of reed, and outputs the value to the port. If the reed open - displays "1" if closed - displays "0".
In addition, the led on the 13th leg of the Arduino lights up, while the closed contacts of the reed switch. Note the inversion of the read sensor signal.
In addition, the led on the 13th leg of the Arduino lights up, while the closed contacts of the reed switch. Note the inversion of the read sensor signal.

3
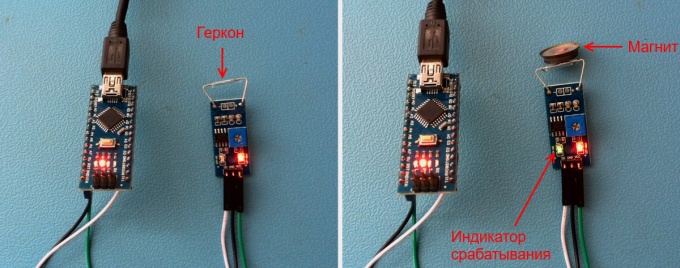
Connect the power to Arduino. On the module will light up the led indicating the power module.
Now going to offer the reed switch permanent magnet the reed switch contacts will close and the led lights up showing the actuation of the reed switch. Again, remove the magnet, the reed switch opens and the led goes out. If we turn on the port monitor, you will see the actuation of the reed switch in the form of zeros among the flow units when the contact is open.
Now going to offer the reed switch permanent magnet the reed switch contacts will close and the led lights up showing the actuation of the reed switch. Again, remove the magnet, the reed switch opens and the led goes out. If we turn on the port monitor, you will see the actuation of the reed switch in the form of zeros among the flow units when the contact is open.
4
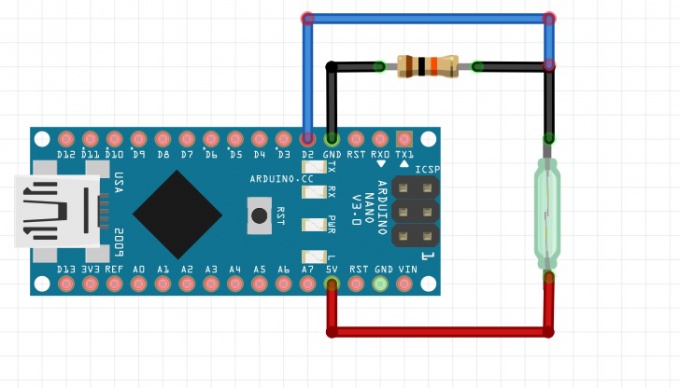
Let's connect separately the reed switch to the Arduino. Everything is very simple. The reed switch is connected similarly to the connection of resistor of 10 ohms. The program will remain the same.
Turn the power on, hold the magnet to the reed switch - led on the Arduino lights up, while the closed contacts of the reed switch.
Turn the power on, hold the magnet to the reed switch - led on the Arduino lights up, while the closed contacts of the reed switch.