Instruction
1
Given that in the crib any space is unnecessary, opening the Word document, first adjust the size of the fields. To do this, go to the tab "page Layout" and click on the arrow button under the thumbnail of the "Field" in the "page setup". In the drop-down menu, select "Custom fields".
2
This will open a new dialog box. On the Fields tab in the same group enter a value slightly greater than "0" (for example, 0.4). Avoid null values, otherwise some of the text may be outside the printable area. Click OK to save the changes.
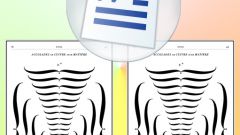
3
Then you can do this in several ways: either to issue each crib in a separate table cell, or to divide the sheet into columns. To draw a table, click the Insert tab. Under "Table" click on the arrow button under the miniature table. With the help of the layout indicate the desired number of columns and rows or create your own table by clicking on the "Draw table".
4
If you prefer to work with text in columns, select the tab "page Layout". Under "page setup" to open the context menu of the tool "Column" and specify the desired number of columns on the sheet. Or select "Other columns" will open a new dialog where you can specify the number of columns and adjust the space between them.
5
Enter the desired text and change its size. To reduce the size of the letters, highlight the relevant text, click the Home tab, in the "Font" from the drop down list in the "font Size" set. Experiment with different values. The font should be small, but at the same time, it should be easy to read.
6
Adjust the text shifted after editing the document, and send it to print. Also make a cheat sheet can be the other way: define the print options you want without changing the font size and not dividing the page into columns.
7
In the menu "File" select "Print". Dialog box opens. In the "Scale" expand "the Number of pages per sheet" and select the desired quantity – 2,4,6,8, or 16. Send a document to print.