You will need
- Wooden block
- Pencil
- Knife
- Semi-circular, straight chisel (on the plan)
- Drill
- Sandpaper
- Stain or paint
- Wax or varnish
- Leather lace
Instruction
1
Take a wooden block of such size that the width, length and height exceed the size of your harp is not less than 1 cm in all directions.
2
Apply for bar pencil sketch of the future owls. Use your imagination and any favourite photos for sample. You can make the owl in the style of a mask or a totem, or cut it similar to this. You are also free to cut the bird flying or sitting.
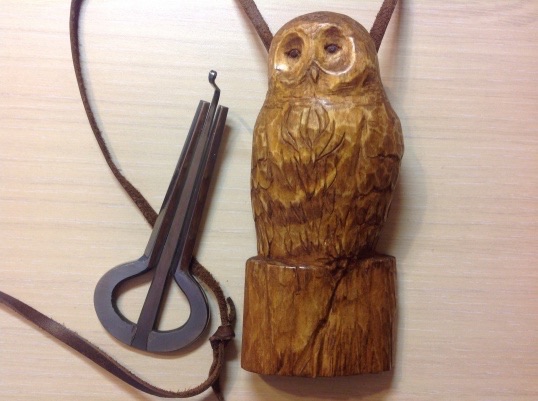
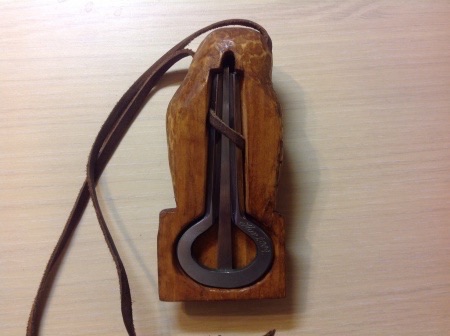
For example, my owl sitting on a stump. The owl's head I used for the recess under the tail of the tongue of a Jew's harp, and a tree stump - for his ring.
For example, my owl sitting on a stump. The owl's head I used for the recess under the tail of the tongue of a Jew's harp, and a tree stump - for his ring.
3
After applying the sketch of an owl with three sides of the bar, past the side opposite the front, trace the outline of his tool. Mark the location holes for the tail.
4
With a knife give the bar form, as part of its plan. For eyes and areas around them if you wish, use a semi-circular chisel. Do not worry if the original image in the process thread suddenly cease to be relevant. Sometimes the wood itself suggests the unexpected possibilities, and leads the hand of the Creator behind him.
Similarly treat the recess for the harp. Drill the appropriate size, make a small hole for his tail.
Similarly treat the recess for the harp. Drill the appropriate size, make a small hole for his tail.
5
After the completion of the carvings go product with sandpaper where needed. Then treat the wooden box-owl with stain or paint, apply a protective layer in the form of varnish or wax. Thread the strap and use with pleasure.
Note
If you are planning to cut the box in the form of a bird with spread wings, use solid wood. For cases with no protruding parts will fit any wood.
