Instruction
1
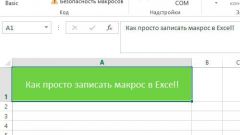
Start Microsoft Office Excel and ensure that you have the Developer tab. To do this, click the Office button in the upper left corner of the window and select the menu "Excel Options". Open the Basic tab and locate the section "top options for working with Excel". Mark with a marker the "Show Developer tab in the ribbon" and apply the new settings.
2
To position a control on a worksheet, click the Developer tab on the "Insert" button under "controls". Unfold the submenu. Select the appropriate item from the "form controls" or "ActiveX controls". The cursor changes to a cross.
3
Click with the left mouse button in the place where the selected item should be placed. When the button appears on the worksheet, it can be freely moved, resized, pre-selected using the left mouse button.
4
If you are adding buttons to the worksheet and assign default names. To rename the button under "form controls", select it and double-click it with the left mouse button. The old name is highlighted, you can delete it and assign the button name.
5
To rename the button from the section "ActiveX controls", click the right mouse button and select from the drop down menu "Object..." (e.g., "CommandButton") and sub-paragraph Edit, the button name will become editable.
6
For further work with the button controls on the form, highlight the button on the sheet and click on the Developer tab of the "Properties" button under "controls". This will open a new Properties dialog where you can specify all the necessary parameters. To work with the ActiveX control, double-click the placed button or click in the section "controls" tab of the "Developer" button in the "View code" window will open Microsoft Visual Basic with all necessary properties and options.