Instruction
1
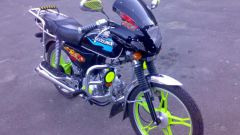
Determine which details of the future of the moped will be purchased and some homemade. With the exception of the engine in unit with the gearbox, the power supply system and ignition, front forks, wheels, gas tank and lighting all can be done independently.
2
Please follow the sketch of the future design on paper or cardboard. Then transfer it to a sheet of plywood and make a Plaz – accurate drawing in full size. This will help to link all the elements of a moped and clarify its layout. The binding of the elements of the design start by placing the wheels.
3
Define the distance between them (database). The silhouette of the front wheel attach the front fork to the wheel. Between the wheels, place the silhouette of the motor in the most optimal location from the standpoint of convenience and reliability of fastening to the frame. Then combine all the nodes of the frame. At the same time avoid unnecessary details, observe the simplicity of form and maximum workability.
4
Start the construction from the frame. It must be welded from pipes of different diameter. Material take unnecessary other frames of motorcycles and mopeds. They have the proper stiffness, I wouldn't say the water pipe. If no welding equipment or skills, contact a workshop for assistance. Rear fork, follow either from pipes or from steel strips. Sheet steel with a minimum thickness of 3 mm cut out plate engine mounts.
5
Before manufacture of the frame store all its components. For bending the tubes in cold tamp them sifted dry sand, plug the holes with wooden plugs and bend with simple bending. It can be made from a car Jack and piece of rail. To the rail, attach the billet thick wire (with a minimum thickness of 5 mm), move the workpiece under the Jack and bend the pipe, pushing the lever rod of the Jack. Continually monitor work using template, cut wire, curved along the contour depicted on the Plaza part.
6
Rear fork run of the steel strip, of a thickness less than 5 mm. In feathers of fork make grooves with a width of 10 mm to the axis of the rear wheels. Turnkey elements of the frame to fasten the soft wire and check the manufacturing and Assembly. Carefully tack weld 2-3 points at each intersection, check again and cook completely. Install the frame brackets motor mounts, slightly taking welding. Check the engine mounts to the brackets and weld completely.
7
If necessary, attach to the rear wheel sprocket from any moped or leading from the front of the bike. Mount follow these three M8 bolts with nuts. Install the wheel into the fork, secure the engine, the power supply system and ignition, tank, seat, headlight and taillights, ignition coil, kick starter, steering wheel and controls (throttle, clutch lever, hand or foot switch gears).
8
Don't forget about the brakes and footrests. Brake install simplified, drum type on the rear wheel. It would be enough for a light moped. Foot pegs are made of pipe sections and secure with welding. Pour the fuel in the gas tank, motor oil in the gearbox. The ignition is set in accordance with the instructions. Speeding up to 15 km/h, check the reliability of the brakes.
Useful advice
If this is your first experience in building an improvised vehicle, use the maximum number of purchased parts and not overly complicate the design of a future bike. Otherwise the project may take many months or years