You will need
- photography buggy;
- - paper of different formats;
- - protractor;
- - two triangles;
- - the range;
- a pair of compasses;
- pencil;
- - gel pen;
- eraser.
Instruction
1
Determine the conditions in which you plan to use the buggy. Will the car move on the road, or it's meant solely for off-road driving? The solution of this question will allow us to more accurately determine the geometry of the chassis and suspension option.
2
If you plan to manufacture the vehicle for recreational riding, not for sports, the focus in the design will give the safety and comfort and not power. Accordingly, the choice will also affect the height of the structure is buggy and the shape of the seats.
3
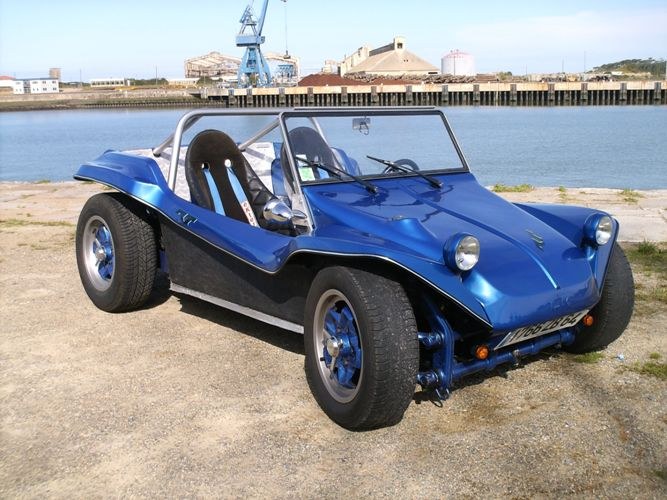
Select the design vehicle that will use as a so-called "donor". Most often for these purposes, domestic cars VAZ-2101, VAZ-2108, M-2141.
4
At the very beginning decide on the equipment compartment of the buggy, which carried out a preliminary layout of units. It is advisable to obtain a precise technical characteristics of a sports car, including the main parameters of structural components and assemblies buggy.
5
Stock up on lots of photos and other images buggy made from a variety of angles. Carefully read the possible car design, to get used to his appearance. Try to look at buggy impartially and in new ways.
6
Set on a sheet of paper the starting point, i.e. the origin of the coordinate system. If you will start the layout with the car's interior, start counting from the driver's seat or from the front wheel axle.
7
Given the available photos and drawings, as well as the size of basic units buggy define and apply to the scheme basic parameters of the model: the three dimensional size track front and rear wheels, the wheelbase, the width of the mirrors, the radii to overcome obstacles and so on.
8
Reflect on the drawing the length of the drive shaft to begin drawing the frame. Start with ground clearance and images of the lower pipes. Clearance make a few more than the "donor" since buggies have to learn the roads. Display the position of the wheels starting with the front. Draw also the seats and vehicle parts.
9
Identify and reflect on the drawing the location of the guide tubes of the frame. The height of the cabin take a few more than the base model; it allows moving the driver seat back a little. Draw a place to mount the battery and fuel tank. Tube frame depicts the layers using different colors. The average number of pipes should be placed at the level where it will be convenient to keep up.
10
Complete the drawing by selecting the required size. Do the explanatory notes to the drawing. If necessary, reduce the technical indicators in a separate table, filling out her application to the scheme of the car.