Instruction
1
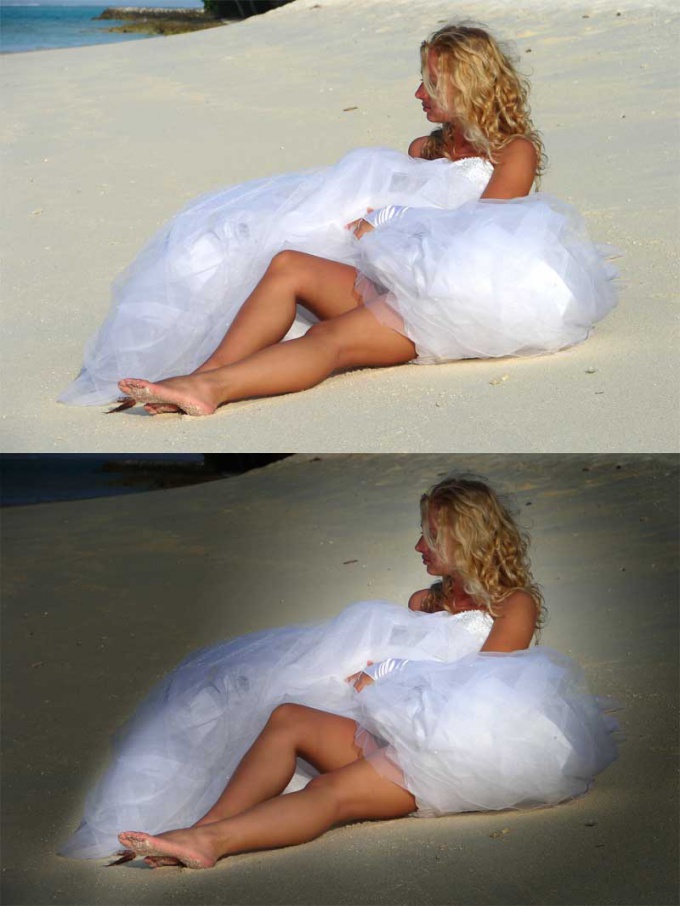
Photoshop is a professional graphics editor with a very large set of tools, so the options of darkening the background in the pictures there are countless. You can just draw the picture blacking brush, one can distinguish the main characters on a separate layer using the lasso and dim the brightness of the background layer, or just use any light filter. We want to offer another way. At first glance it looks a bit complicated, in fact, nothing difficult or unusual to do not have, and the result of this dimming looks very natural and beautiful.
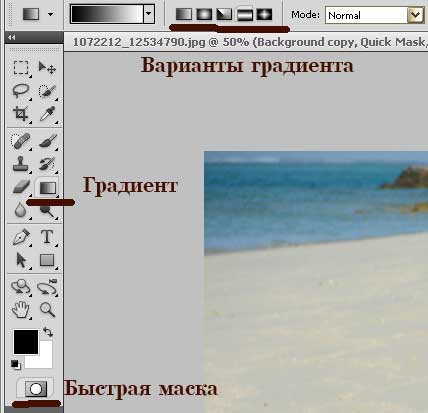
2
For successful work we need a Quick mask and Gradient, located on the toolbar. Select the kind of gradient will depend on the shape of the main element of the photo. For example, when working with a portrait it is better to choose gradient number two with the rays radiating from the center, in our case, will use the gradient of the number 4, which will give us a smooth transition along the entire main element.
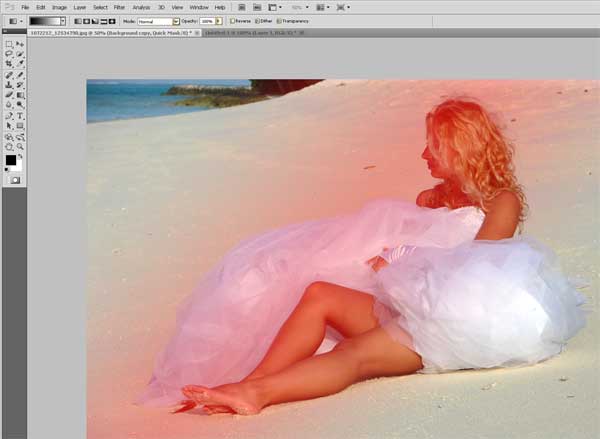
3
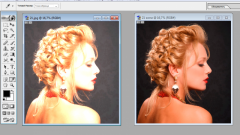
Hit the Quick mask button. Go to the gradient tool, choose the most suitable option and apply a gradient to the image so that the main element was filled in with red. It should look like this.
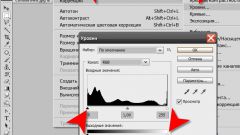
4
Click again the Quick mask button, leaving thereby its mode. Keyboard shortcut CTRL + J copy the selection to a new layer. Navigate to the points of the Image – Adjustments – Brightness/Contrast. Move the sliders, reducing the brightness of the layer, and increasing or decreasing the contrast. It all depends on what you would like to see the future picture. If are darker and the areas that you would like to leave the light, there is nothing to worry. Turn on the desktop layer mask and alternating black and white soft brush, remove, or add the shading to the desired area of the image.
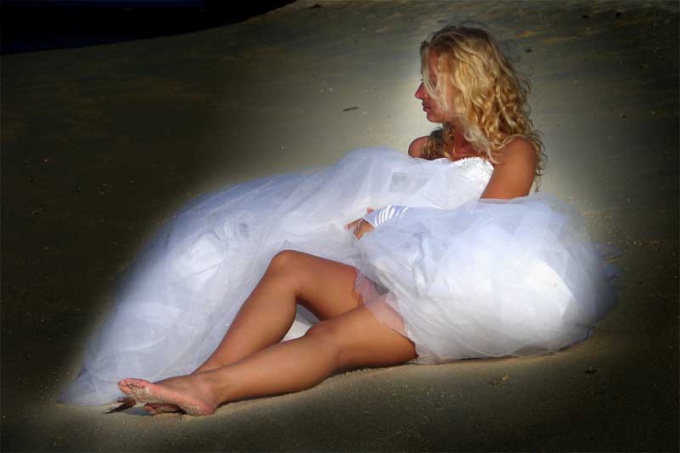
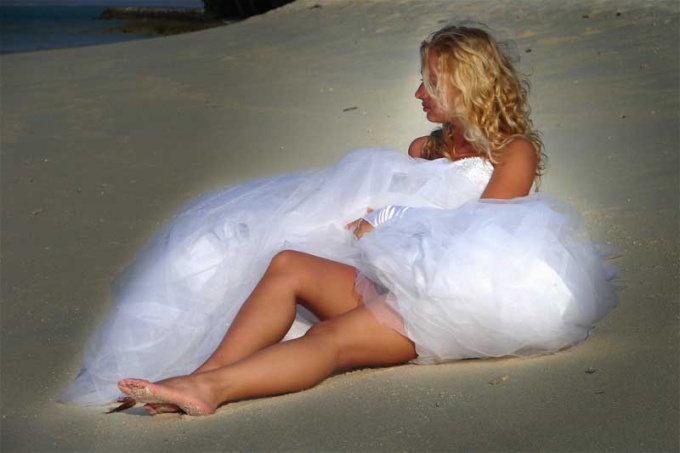
5
We can say that the background is already dark, we have highlighted the main element in the photo is the girl in white and a completely dark background. The result looks a little unnatural, and if you prefer looking more natural, lower the opacity of the top layer of 30-50 percent. This algorithm is suitable not only for darkening the background, but also to create vignettes of different opacity and diameter.