You will need
- - photo with a darker background
- - computer with installed Adobe Photoshop
Instruction
1
Upload a photo file, which requires a brightening of the background. If you need to pre-cut the unnecessary edge of the frame and prepare for the end size. If the picture is too dark, even the lightest of details and seats on it look muted, try to hold one simple operation.
2
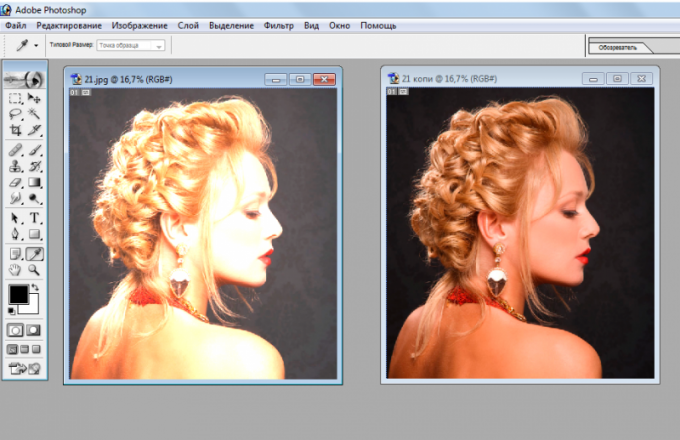
Go to the menu "Image" (Image) "Auto recovery contrast" (Auto Contrast). Such action will not result in the loss of information in the photo that distinguishes it from most other operations. The photograph will not disappear any detail, and this is very important for further processing. The result of this action the most, the light areas will be lighter, the darker – in fact, the darker, that is, the optimized dynamic range of an image. Because of this, there is a possibility of correction of mistakes made during exposure, due to the automation of the camera or inept actions of the photographer. Usually the image becomes clearer and brighter after the operation.
3
Make adjustments in the overall gamma of the image. Apply to menu Image>Adjustments command "Levels" (Levels). It is also possible to use the key combination Ctrl+L.
4
To even out the tone of the picture, move the middle slider under the histogram to the left, while the lighting pictures will not be needed, pleasant to the eye level. This correction method is more secure than, for example, the standard operation Brightness / Contrast (Brightness/Contrast).
Note
Note that in the case of lightening of the picture by changing brightness detail from a medium to a lighter tone elements that were so bright, beyond the dynamic range. In other words, information is destroyed. That is, where there was light transitions, formed a bright solid spots of large size, and the image within them disappears. Therefore, the panel is allowed to apply only for cosmetic purposes.