You will need
- - iPhone;
- - computer with iTunes installed;
- - Internet;
- - the password of your account;
- - the Internet browser in iPhone.
Instruction
1
Throw off photos on a computer for further transfer to iPhone. Create for them a special folder to then be able to quickly download them to your phone. Make a note of its name.
2
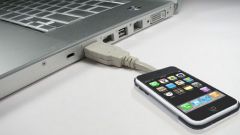
Connect your iPhone to the computer. Wait for the download iTunes. Enter your password and make synchronization of devices.
3
Folder "Images" in your iTunes library does not exist. Then under "Devices" your iPhone. In the opened main window, find the "Photos" tab. Click on it with the mouse. Check the box next to the phrase "Sync photos from...". In the window "Images" click on the arrow in the popup window, select "Choose folder...". Enter the name you created the directory, confirm by the button "Select folder".
4
Choose whether to synchronize: all folders or only selected. Note that the folder is not marked when you select will be removed from the iPhone. To put them back, it will be necessary to do a re-sync. After some time the pictures will be thrown on the phone.
5
Save pictures from the Internet directly through your iPhone. Go to the page where you placed the image you want, click on it. Select "full size" to download the photo and of good quality. Place your finger on image and hold for a few seconds. The bottom menu will appear. Click "Save image". It will be immediately downloaded to your iPhone.
6
All uploaded images are stored by default in the folder "Photo" tab in the "camera Roll." You can edit this section by adding the folder that contains only the necessary pictures. It does not delete them from camera Roll, they are then automatically deleted from the created directory.
7
Go to "Photos". At the top of the window on the right, click "Change". To the left you will see the icon "Add". Click on it and enter a name for your album. Select the photos and click "Finish" to confirm. The only folder with required images created.
Note
Do not delete the folder from the computer and not move it. Otherwise, when the next sync it will be deleted from the iPhone.
