Make the workpiece
For the manufacture of small figures suitable old Newspapers or paper for printers. Large numbers it is best to make paper Wallpaper. For a couple of numbers will suffice half of the roll. Need more PVA glue or starch paste, a sharp knife, a piece of cardboard for a template, latex paint, foil or colored paper, gouache.
Make a cardboard template. It just needs a figure in full size. If you want to have it with a slotted pattern on the template and cut out the pattern. Of the Wallpaper pattern will have plenty of blanks. There should be no less than twenty. If your figure will be no slots, just trace over the pattern twenty times and cut out each piece. For figures with hollow out half of the blanks to make solid, and half – Welt with pattern.
Manufacturer numbers
Lay one piece. Thoroughly lubricate it with glue. Gently lay the second workpiece, aligning all edges. Allow the layers to dry then apply the next sheet, the fourth, fifth, etc. If the figure is solid, just glue all the blanks. Align the edges with fine sand paper. Cover the figure with latex paint and top paint with gouache. You can cover your creation with acrylic lacquer or even hairspray.
To make the figure with a slotted pattern, glue the first half – the bottom without a pattern, the upper pattern. The upper part Prime and paint. The half that is at the bottom, place foil or colored paper. Glue the layer with the slits. Such figures will look good floral or geometric pattern. You can make a design in folk style – for example, East.
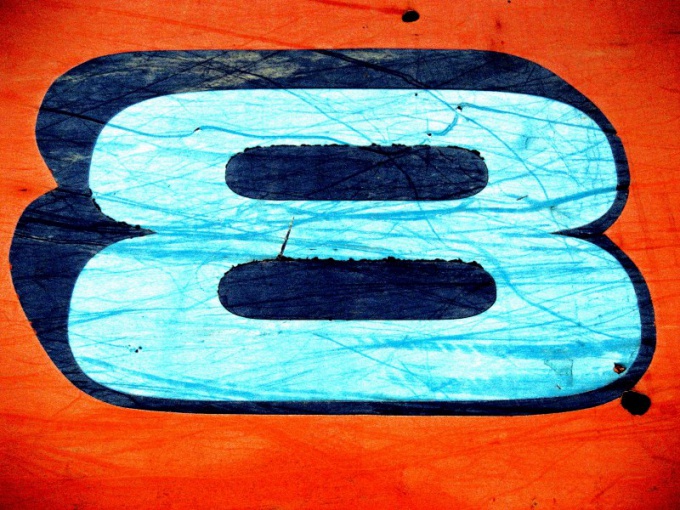
The numbers of non-corrugated paper
For such figures need packaging Board and corrugated paper. The thicker the cardboard, the more effectively it will look a digit or letter. Draw the desired number directly on the cardboard (preferably with a ballpoint pen or marker), cut it out. Remove the edges of the most notable irregularities. Perfectly straight line in this case is not needed, the circuits will be hidden by the fringe of corrugated paper.
Paper cut into strips. Their length should be about one and a half times the width of the letters to the strip it was possible to close the sides of the workpiece and still have the allowance to glue it to the backside. Cut each strip comb. Stick the strips start from the bottom. Each following strip stick so that the fringe had closed the strip attached to the cardboard. The upper strip is better to make some wider than the others, in order to bend on the back side.
These figures are for panels. If the decoration will stand on the table, you need to wrap the fringe all of the letters, and the bottom to make the stand (e.g., thick cardboard).