You will need
- - a roll of spandex;
- - sewing machine;
- - reinforced filament;
- needle;
- - cut the main fabric and flap for exercise.
Instruction
1
Wind the thread rubber on the Shuttle bobbin by hand, well pulling it. You can use automatic winding.
2
Adjust the tension of the spandex, tightening or loosening screw – this will depend on the density assemblies. Your task is to ensure that the gum was coming from the cap with little effort (but not too hard or easy).
3
Thread the upper thread. It needs to be reinforced to ready the booth was kept in for further heavy loads.
4
Set the maximum length of the stitches. String will be used normal, straight.
5
Leave in the beginning of the lines rather long "tails" of the threads. Reinforced thread pull on the wrong part of the canvas and associate it with spandex in a sturdy knot. To secure the future Assembly, you will need to protegat initial segment manually.
6
Start doing a neat line from the "face" of the product. The first seam is still quite weak, so you need to perform a couple of parallel lines. Proceed in the following sequence: prostrochite the Assembly line the first time through; turn 90 degrees; make parallel a line, etc.
7
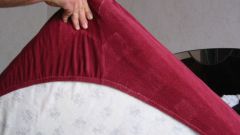
Be sure to stretch the fabric with your hands so under the machine foot assemblies are not formed!
8
Good practice in sewing and threadelasticto determine the necessary compression ratio of the fabric assemblies. Note on the sample of the canvas seam. It should be the same material from which you are going to sew the smocking! Build can get you more or less taut and lush, depending on the spandex, the fabric or yarn tension. Only by choosing the best option of the sewing Assembly, to commence the entire product.
9
It is recommended to perform line Assembly in separate parts of the garment, and then stitch the model. Don't forget to do the reverse at the end of each finished Assembly, or to fix "tails" manually. Then your self-made outfit for a long time will not lose shape.
Note
Do not route line Assembly on a thick hem (e.g. on the neckline). In this case, the thread rubber would be bad to lie on the canvas. It is recommended that you stitch on two layers of fabric, and just below the hem.
Useful advice
Try the simplified method and thread elastic sewing machine. Select a zigzag stitch and put it under the foot work sheet. On the Assembly line put the spandex and pristrochite it zigzag. Then you can gently tighten the elastic band (the Assembly forming the desired splendor) and fix it manually.