Instruction
1
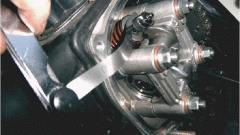
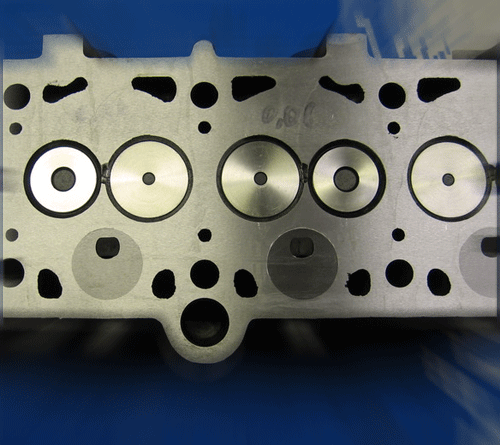
First of all, you need to make sure that this trouble is to blame the gas distribution mechanism. To do this, remove the valves from the cylinder head. Before removing, make their marks as after inspection and repair, each of them needs to go back to his place.
2
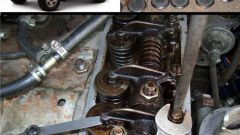
Thoroughly clean the valve seat and the surface of the head around the valve face. Carefully inspect the cleaned surfaces. In the case that you will find at least one of the following fault recovery is not possible, and these details will need to be replaced:
• cracks, vicoli in the saddle;
• defects on the working surface of the valve burnouts;
• wear beyond the permissible limits.
• cracks, vicoli in the saddle;
• defects on the working surface of the valve burnouts;
• wear beyond the permissible limits.
3
After faulty parts are replaced, perform the lapping the valves and seats, followed by check their integrity (with the valve closed should not pass exhaust gases).
The procedure for lapping the following: the valve install soft spring in such a way that between the saddle and the plate remains a gap. When you press on the valve until it contacts with the saddle it should be easy to clean.
The procedure for lapping the following: the valve install soft spring in such a way that between the saddle and the plate remains a gap. When you press on the valve until it contacts with the saddle it should be easy to clean.
4
On the saddle apply a thin layer of polishing paste and turn the valve left/right 180 degrees. At the end of the turn valve is lifted by the spring, and to return it you need to "slap" against the saddle. So spend grinding the working surfaces. At home, it is better to do by means of rotation, in the extreme part of which is wearing a rubber suction Cup.
5
Control the lapping process visually. After the valve face formed matte rim width more than 1.5 mm, the grinding is finished.
Install the valve into place. The quality of the work performed, check the old tried and tested method: pour under valve kerosene and in 5 minutes, see if he passes through the valve.
If no leaks, then the work carried out efficiently and the extra effort from you is required. If the kerosene leaks, then operation with the grinding of the valve must be repeated.
Useful advice
To ensure that the lapping process does not cause a wear of the guide bushing, lubricate it with engine oil.