You will need
- An ohmmeter (multimeter tester).
- Tool set for removal of the sensor.
- A rag or napkin.
Instruction
1
When removing the sensor make sure that the fuel tank was not completely filled. Drain the fuel tank or siphon it in any pump. Do not inhale gasoline vapors to avoid poisoning. Work outdoors or in a ventilated area.
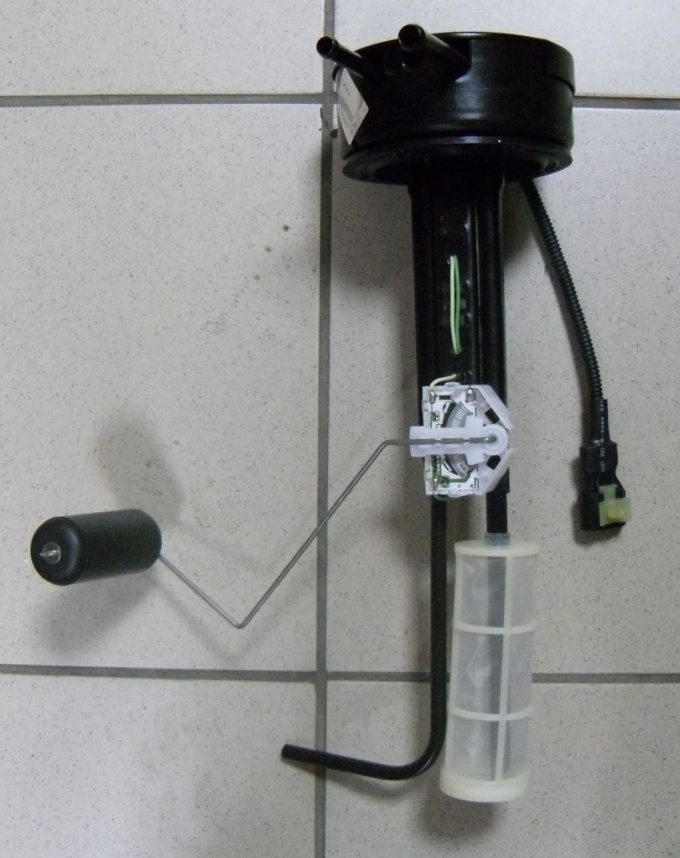
2
Disconnect all the wires from the battery terminals. Match the gauge of level of fuellocated in the fuel tank. The position of the fuel hose mark any method (e.g. tape). Disconnect the fuel pipe from the gauge of level of fuelby loosening their clamps. Disconnecting hoses produce gradually, wiping spilled fuel with a rag. Disconnect sensor electrical connector.
3
If the sensor is installed in the fuel module, it is approached by several wires. For ease of Assembly, note the location and color of detachable wires. Unscrewing the mounting sensor, lift it up and off, tilting to the side. Spilled fuel immediately remove. Disconnect the fuel hoses are marked.
4
To test the sensor , connect an ohmmeter to the terminals of the mass and the variable resistor sensor. While holding sensor in position, when the float is at the bottom (no fuel), warning lamp fuel closed, remove the ohmmeter. Compare the readings with those in the specifications.
5
Turn the sensor so that the float is at the top position (a full tank). Measure the resistance between the terminals and compare with the specifications. Gradually move the sensor from one position to another. The resistance on the ohmmeter should change smoothly, without jumps and failures. Connect an ohmmeter to the terminals of the mass sensor and warning lamp fuel. In the normal position (tank empty) the resistance should be almost zero. In the inverted position (tank full) the resistance must be infinitely large.
6
When assembling the sensor install a new o-ring. For this hole, first insert the o-ring and then the sensor itself. After Assembly, check the operation of the pointer of fuel on the instrument panel.
Note
At work with fuel system observe fire safety.