You will need
- Epoxy resin, fiberglass, paint brushes, masking tape, foil, polystyrene foam, polyurethane foam, bumper-donor.
Instruction
1
Have bumper donor car on a workbench plumbing or a specially made stand in the garage. To be pasted on its rear (inner) side with masking tape in several layers.
2
Mark on the layer of adhesive tape, the location of the structural elements of the bumper – it can be technological holes for air intake, the tuning, the holes for additional optics etc.
3
Glue pieces of foam on the bumper directly into the layer of masking tape. With a sharp knife give the foam the desired shape. Sizing also foam at fixing the bumper to the car.
4
The edges of the bumperas a donor fasten pieces of paper and also pasted over them with masking tape. It is necessary to hold paint foam from spreading. Fill in the required spaces painting foam. Leave for a few hours for complete curing.
5
Remove the cardboard around the edges of the bumper. Remove the old bumper with a frozen design. The previously pasted adhesive tape will help to carry out this operation much easier. Using sandpaper and a sharp knife clean the edges of the resulting Foundation for the future bumper. Brought the state to a flat and smooth surface.
6
Basically, the whole basis of the bumper with aluminum foil, and proceed to the application of epoxy and fiberglass. First coat of epoxy foil, then apply a layer of fiberglass. Smoothes it using a plastic scraper, avoiding the formation of creases or air bubbles. Then again apply a layer of epoxy and a new layer of fiberglass. Repeat the procedure 5-6 times. Leave the bumper to dry completely.
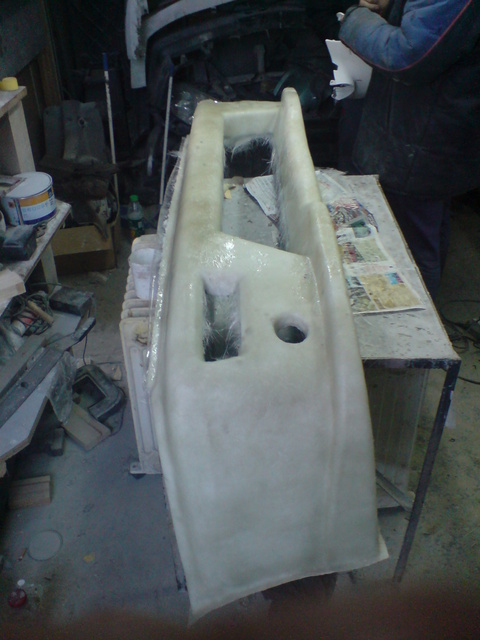
7
Rassadina the entire structure. First extract the basis. For easier retrieval, you may need to cut it into pieces. Received a new bumper polished with emery cloth until perfectly smooth surface. Then primed and paint. Made with their own hands bumper ready.
Note
Epoxy resin should be carried out only with rubber gloves.
Useful advice
The foam should be applied thinly, as it will increase in volume.