You will need
- alternative optics;
- - a set of tools;
- - cotton gloves.
Instruction
1
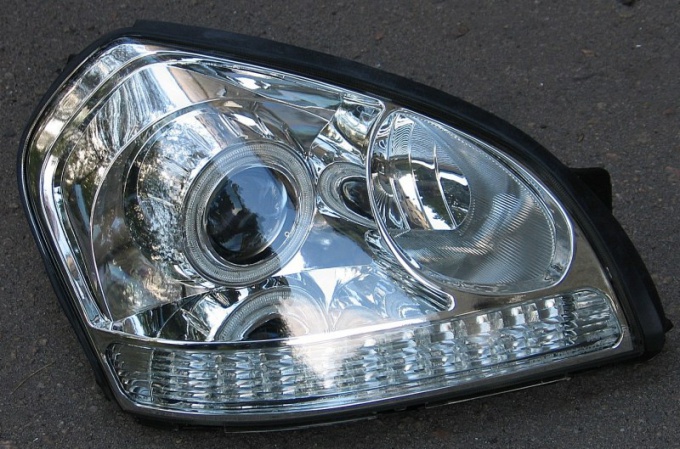
Carefully read the label on the box alternative optics, and installation instructions, if any. The main requirement to install the parts is a complete identity of the buildings, otherwise not be able to properly install the new optics.
2
Open the hood and disconnect the connector terminals "minus" from the battery. This is necessary to minimize the risk of occurrence of a short circuit to zero, as you will disable the headlamp connectors.
3
Remove the center grille by unscrewing all the screws that attach it. On some vehicles the headlamps can be removed without removing the Central grille.
4
Look on the back housing of the headlight harness pads. Gently remove them and set aside. It is best to wrap each Shoe in clean rag to avoid dirt.
5
Look on the top and back side of the case all the screws and bolts. Remove them, previously marked out the location of each. The bolts may differ from each other in width or length. If you incorrectly install them when reassembling, it's going to ruin the thread.
6
Grasp the headlamp housing and carefully remove it from the recess. Check integrity of glass and plastic parts.
7
Thoroughly clean the headlamp socket. Remove from packaging alternative optics. Try one of the headlights. Watch carefully that between the lamp housing and the walls of the holes were not the slots and other openings. If the optics is of poor quality, gaps may appear. They can be fixed by filing the plastic or the manufacture of special gaskets.
8
Install the new headlamp Assembly and secure it with screws. Then plug the pad wires on the back side. The same manipulations produce with the second headlamp. Test the strength of fasteners.
9
Connect the "minus" terminal to the vehicle battery and test the new optics. Remember that most alternative lights to pass a technical inspection is impossible.