Instruction
1
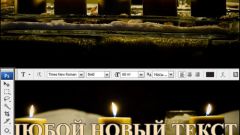
If the image came to you in the format *.PSD, that is in the format of the program Photoshop, replace any decals is not difficult, provided that the inscription is on a separate layer. In this case, open "Window" - "Layers" or just press F7. A window will appear with layers. Select the layer with the inscription, then point to the label and click. Now you can easily erase the old label and insert a new one. When replacing do not remove all the letters to keep the format of the text.
2
More often the user has to work with conventional image format *.jpeg. The complexity of the replacement of the inscription in this case depends on the background on which it is located. If the solid background, select the eyedropper tool and click on the text – you have to remember its color. Press tool set the foreground color (the top square at the bottom of the toolbar) and record the color.
3
Specifying the color settings, re-select the "Eyedropper" and click on the background next to the model text. Now paint over the old text with the Brush tool. If necessary, apply the blur to the background was not homogeneous.
4
Reopen the tool of choice of the base color and enter the color information of the remote text. Select the Text tool. Set the font the same which had shaded lettering. Move the cursor to the beginning of the text and click the mouse. Enter the desired text. If it is different, go back and adjust its settings.
5
If you have to change all text, a few letters, select the magnify tool and zoom in to the desired letter to such an extent that there is visible pixel structure image (small squares). Now, changing the color of specific pixels, change the text as needed. Somewhere insert the background pixels, where the pixels corresponding to the color of the text. This work will require a lot of time and effort, but the result is very good.