You will need
- Graphic editor Adobe Photoshop.
Instruction
1
Create a new document that will contain the inscription. To do this, press CTRL + N. the create dialog, specify the dimensions, sufficient to accommodate the intended text.
2
Make a fill the only layer with any color to its background easier to see the created text press the G key and click the empty picture with the mouse.
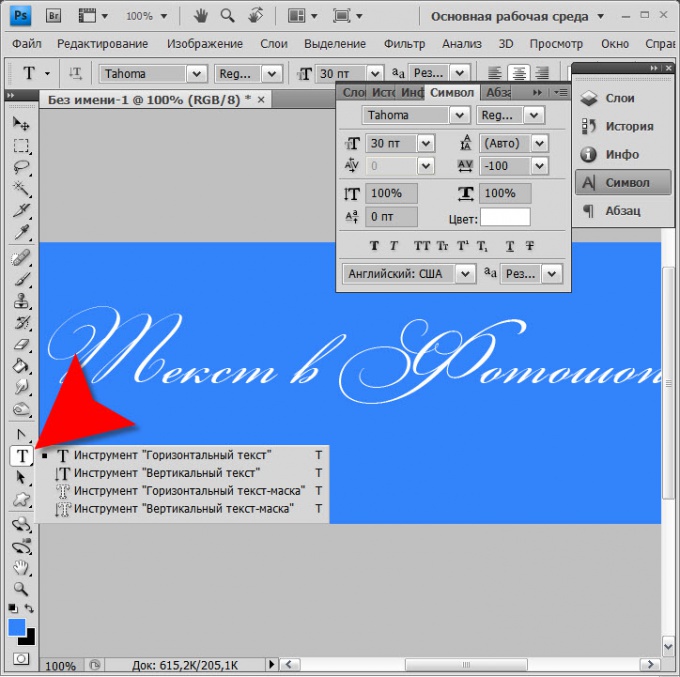
3
Press and hold the second icon with the letter T on the toolbar. In normal click this icon includes a tool for creating textss label, and for a longer you hold the left mouse button provides the access to selection of several varieties of this instrument. "Horizontal text" is the most common variant, it is possible to write in the same way as in simple textsom the editor. After selecting this tool, click anywhere and begin typing. Photoshop will create separate texts of thefirst layer."Vertical text is similar to the previous one, but after each letter editor for you to make the move to the next row, i.e. the letters are placed one under the other."Horizontal text mask" works differently. This tool also allows you to type horizontal text, but textsfirst layer is not created, but rather, a notched region along the contour of the letters, words and lines which you are typing. Once the label is ready, you can click on any existing layer with the image and cut it your text, simply pressing the Delete key. And can on the contrary, invert the selection and cut out the picture, leaving only your earned inscription. There are plenty of other ways to use this tool.
4
Click the document and start typing. Then click the first icon on the toolbar (the Move tool) to deactivate the text entry mode.
5
Open in the menu "Window" and select "Symbol" to change the parameters marked with graffiti. The first (upper left) drop-down list on the settings panel allows you to change the font of the label (headset) on one of the installed in your computer. To his right, placed the selector styles - standard, oblique, bold and the combination of these three. Second row from left - field to select (or manual input) font size (point size), to the right - adjust interline spacing (leading). The third line contains two regulator of spacing between letters (kerning and tracking). The line below you can specify the compression rates of the standard letter sizes separately for vertical and horizontal. Even lower you can set the offset of the selected letters or words relative to the rest of the text vertically (the baseline offset). Clicking the rectangle labeled "Color" to open the selection dialog for hue made the inscription as a whole or only the selected letters.
6
At the bottom of the panels placed icons that allow you to make the letters bold, italics, uppercase, uppercase preserving the sizes of uppercase (capitals), Superscript, subscript, underlined, strikethrough. Here they are listed in order from left to right. In the bottom row the left list allows you to select a language for hyphenation, and the right method of smoothing fonts.
7
Save the document in the Photoshop format when you have finished formatting the text. This can be done by pressing CTRL + S.
Note
To create a message, in the toolbar, click the icon with the letter "T". In the window that appears you must enter the desired text and click on the empty space to secure the image.