Instruction
1
Run the GUI editor and upload, or create from scratch the logo itself - this part of the work depends entirely on your artistic preferences and initial data (company name, clan or organization, symbols that should be placed on the logo, etc.).
2
Place all the layers in a psd document in the same folder - in this case, there will be no need to adjust the transparency of each layer individually, and you can do it for the whole entire folder. To do this, click in the bottom right of the layers panel icon, when you hover over that POPs up the words "Create new group" and then select the layers and drag them to the folder you created. If the document exists and the background layer, it don't need to move - keep the outside of the folder.
3
Turn off visibility of background layer by clicking the icon with the image of the eye at the left edge of the row belonging to this layer. Actually, editing this can be completed if the logo itself should be opaque and transparent should be only the background - in this case skip the next step.
4
Select the folder you created (click on it with the mouse cursor if you want the logo to make partially transparent. Then open the drop-down list next to "Opacity" and use the slider to choose the most appropriate degree of transparency of the logo.
5
Trim the excess space around the logo so we can use it in the future. Open the menu of the graphic editor of section "Image" and select "Trimming". In the window that will open, check the box to "transparent pixels" and click "OK". The editor will resize in accordance with the width and height of your logo.
6
Save the logo in the native format of Adobe Photoshop. This file you will need in case if you need to make any changes. The save dialog is opened by pressing ctrl + s.
7
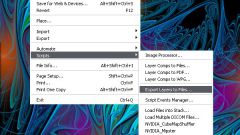
Create an optimized file with the logo that can be placed in the documents you need. To do this, press alt + shift + ctrl + s and the window image optimization open. It is designed to ensure that you have the opportunity to choose the most appropriate graphical format, and picked up for him are picture settings that give the optimal ratio between the quality and weight of the generated file. The second from the top drop-down list contains the possible file types - select either gif or png. These two formats support transparency, unlike, for example, from a jpeg format. Keep in mind that the png format does not always properly displayed with Internet Explorer. Then make sure that the checkbox "Transparency" offered mark, and then click "Save".
8
Specify the save location in your computer and the file name of the logo, and then click the "Save"button.