Instruction
1
A lot depends on what graphics editor you are working with. The simplest program type standard Paint, in principle, does not support transparency. More functional program Paint.net, CorelDraw, Adobe Photoshop (and similar) allow you to adjust the transparency of images and supports the work with layers.
2
To adjust the transparency (partial transparency) of the image or any part of it, create new layers and use the tools in your editor to customize the display of layers. Depending on the editor features, perhaps before saving you will have to merge all layers.
3
To save the image in the form in which you see it in the editor, click in the upper menu bar item "File" (File). From the drop-down menu, select "Save as" (Save as). In the dialog box, specify the directory to save the file in the "file Name" (File name) enter the name under which you want to save the file. In the field "file Type" (Format) from the drop-down list, select PNG(*.PNG) and click on the "Save" button (Save).
4
In that case, if the Union of the layers leads to a loss of transparency, or save the image without merging the layers, or set your editor tool that allows you to export layers in the format .png without losing the transparency (for example, Adobe Photoshop standard tools can't do it because list formats does not expand .png).
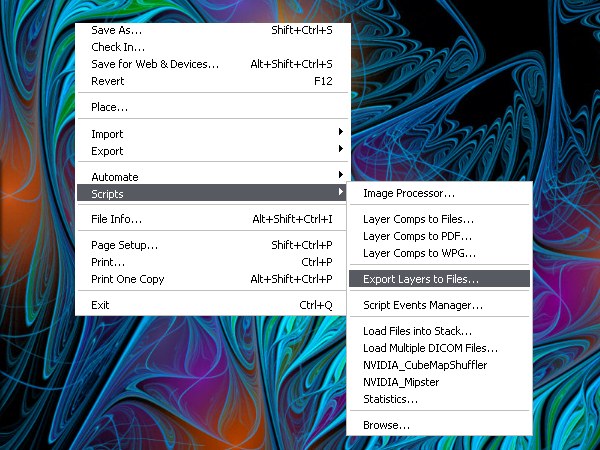
5
Download from the Internet the appropriate script. As a background, set the transparent layer and the main image place it on another layer. Select in the top menu bar item "File" in the ensuing menu - item "Scenarios" (Scripts) and the command "Export layers to files" (Export Layers to File).
6
In the dialog box, select the directory to save the layers, set the marker in the field next Fast Mode (Don't remove hidden layers) in the "file Type" select the format .png and click "Run" (Run). This will lead to the fact that you will have saved two files: one empty and the other will be the image with your opacity settings.