You will need
- - Movie Maker;
- - After Effects;
- photography;
- video.
Instruction
1
If all you need to this photo appearing in any place of the video produced by and remaining on the screen for a few seconds, upload a video and photo to Movie Maker, using the option "Import video" and "Import images" which can be found in the "Operation".
2
If you need to insert an image before the video or after it, drag the photo with your mouse to the timeline and paste to the right place. If a static image you need to add in the middle of a clip, place the pointer of the current frame to the place where you are going to insert a photo. Cut the clip with the option "Split" from the menu "video" and paste the picture between the video fragments.
3
Can add a transition between video and photography. To do this, open the jump list option "View video transitions" from the "Operations". Select a transition and drag it to the joint between video and photography. To change the duration of the transition can be, putting the new value in the settings window that opens select "Options" from the tools menu. Go to the tab "advanced settings" and enter the desired length in the field "Duration of transfer".
4
To save the video with the inserted photo and click "Save to computer" from the Windows operations.
5
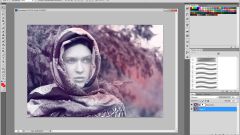
If you want to live in a frame made from photos, or add moving clouds to the landscape in the picture, you'll need to upload a photo and a video in After Effects. It is possible to make an option File from a group Import File menu.
6
Place both files on the Timeline palette. If the photo will overlap the part of the video, it should be on the top layer.
7
If you need to impose on video a translucent photo, expand the parameters of the layer with the picture by clicking on the button with the arrows on the left of the layer name. Reduce the value of the Opacity setting for this layer.
8
In order to leave in the frame part of the photo, overlapping the video, draw a mask on the layer with the photo. This can be done using the Pen Tool. Closing the contour of the mask, expand the settings the same way as other layer settings.
9
If part of the photo bounded by a contour of the mask should be visible in the final video, select Add from the list of mask modes. In order to make the image located within the boundaries of the mask, transparent, point to Substract. Adjust the feathering of the borders of the visible part of the picture, changing the value of Feather.
10
To save the final edited video will move the composition to the palette Render Queue, using the option Add to Render Queue from the Composition menu. The save file will start after you click Render.


