You will need
- - Adobe After Effects;
- video file.
Instruction
1
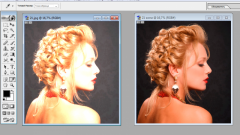
Open the video that you want to work in After Effects, the File command, when this option is selected in the group Import File menu. Move the file with the mouse to the palette Timeline.
2
Folder Keying, which is on the palette, Effects&Presets, take the filter Luma Key and drag & drop onto the video Timeline in the palette. Can drag it on the preview video in the palette of a Composition, when you select the layer to which you are going to apply a Luma Key.
3
In the Effect Controls palette, configure the settings of the applied filter. If you wish to remove from video dark pixels, select from the list Type the option Key and Key Out Darker. If, on the contrary, you need to remove the light areas, use the option Key Out Brighter.
4
Specify which pixels you are going to replace transparent by customizing values of parameters of Threshold and Tolerance. The setting changes can be immediately observed in the preview window.
5
Adjust the edges of the opaque areas of the image settings Edge Thin and Edge Feather. The first parameter will reduce the size of the opaque areas of the video, and creates a Feather Edge on the boundary of the transparent and opaque sections oblast translucent pixels. They are sometimes useful as soften the hard cut edges of the figures in the foreground, and in some cases can spoil the whole impression of the work surrounding the object is shimmering halo.
6
If the figure in the foreground, efficiently separated from the background in the result of the previous manipulation, but on the edges of the video remains the background that do not overlap with the object, it is possible to save the situation by removing their mask. To do this, select in the pane under the main menu, tool the Pen Tool. With it, draw a mask around the area you want to remove the video.
7
Expand the layer options in the Timeline palette by clicking the arrow to the left of its name. In the same way, expand the parameters of the mask, revealing the Mask item. Change the mask mode from Add to Substract by selecting a new mode from the drop-down list.
8
Save project command Save Project from the File menu, if you're going to continue to work with the video in After Effects. If the rest of the processing will be done in another program, save the file with transparency. To do this, send the video to the palette option Render Queue Add to Render Queue, which can be found in the Composition.
9
In the palette Render Queue, open the output video settings by clicking on the word Lossless. From the list of Channels, choose RGB+Alpha. After clicking on the Render button, the processed clip will begin to persist.