Instruction
1
Structurally, the cleat is a rectangular plate with complex profiles, holes for fixing and the bent tabs that hold the front elements. The hooks are divided into starting and ordinary. The rank and file have 4 reeds that are easy to attach facade panels next to each other. Starting clamps have two tabs and installed on the edges of the front surface, top, bottom and both sides. They are attached to the extreme elements. They are installed with different orientation of the reeds, depending on location. Sometimes the starting clips are ordinary, cut in half.
2
The fixing of capping is by means of screws or finish nails with small heads. At the finish of wall or door paneling clip start clamps on the bar or base to the bottom using finishing nails tabs up. Next, paste the first plate lining. On top of the plate line and mark the studs fasten the hooks. Insert the plate into the fastener. Try second plate, etc.
3
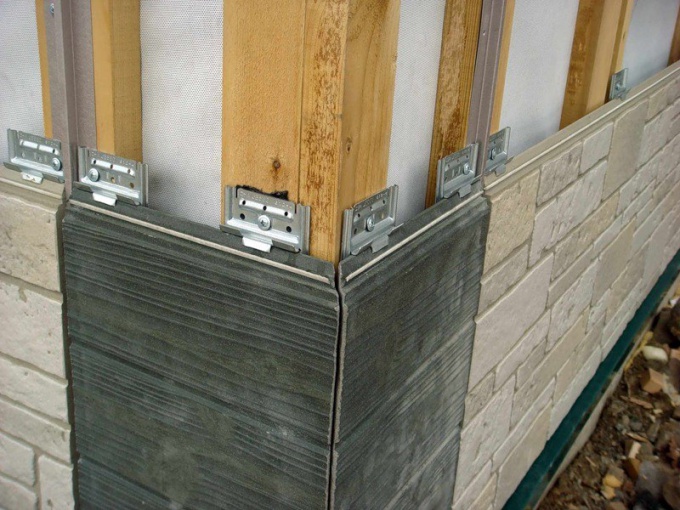
When decorating facades with slabs of granite or other material insert those clips into the mounting profile and secure them with screws. The level should be accurately calculated and must be identical in height and width of the tiles, since this affects the appearance of the facade.
4
Insert the tile in the cleat each other. As gap mounts the petals by 1 mm less than the thickness of facade tiles, it is securely fixed and does not fall out even when split. Usually the front clips fix the corners of the tiles: start of two adjacent, ordinary four.
Note
Because the hooks can withstand heavy loads and exposed to adverse atmospheric influences (moisture, dust, automobile exhausts), they are made mainly of stainless steel or galvanized iron, they do not rust and do not bend.
Basically, the clips are made by factory way. Perhaps custom-made reinforced mounts for fixing porcelain tiles, etc. the heavy plating. For aesthetics, clips painted in the colour of the façade powder termoemcali or paint the facade.
Basically, the clips are made by factory way. Perhaps custom-made reinforced mounts for fixing porcelain tiles, etc. the heavy plating. For aesthetics, clips painted in the colour of the façade powder termoemcali or paint the facade.