Instruction
1
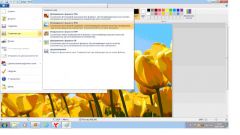
To save a document as a picture in the graphics editor, specify the correct file extension (.bmp, .jpg, .dds .png and so on). For this - for example, Adobe Photoshop - in the top menu bar click on "File" (File) and select "Save as" (Save as). In the opened dialog box, specify the directory to save in the "file Name" (File name) enter the name of your file in the "file Type" using the drop-down list, select the desired format. Click "Save".
2
To save the document in a crossplatform format in Microsoft Office Word or Microsoft Office Excel, click the round Office button in the upper left corner of the document and select the menu command "Save as". After you select the directory and enter a name for the document using the drop-down list in the "file Type", select the PDF extension (*.pdf) and click Save. If you want to further text in the document available for editing, save your document again, but in text format. Keep in mind that if you save the document in the format .docx (.xlsx), and then just correct the file name extension .pdf, you will not get the desired result.
3
The other method involves a more creative approach. Open the document that you want to make a picture and "take a picture" of it. To do this, use any app to capture images or use the Print Screen key. Open a graphics program that was just taken (and if used the Print Screen button, create a new document and insert the image from the clipboard), if necessary, edit the picture (crop fields, adjust the contrast, color and so on). Save the file in image format.


