Instruction
1
Launch Adobe Photoshop, load the desired file, and click on the toolbar, one of the icons relating to the selection tools the selected image area - there are three and each contains a few different variations of the instrument. To switch varieties of each tool, click its icon with the left mouse button and wait for a drop-down list, and then click the desired option.
2
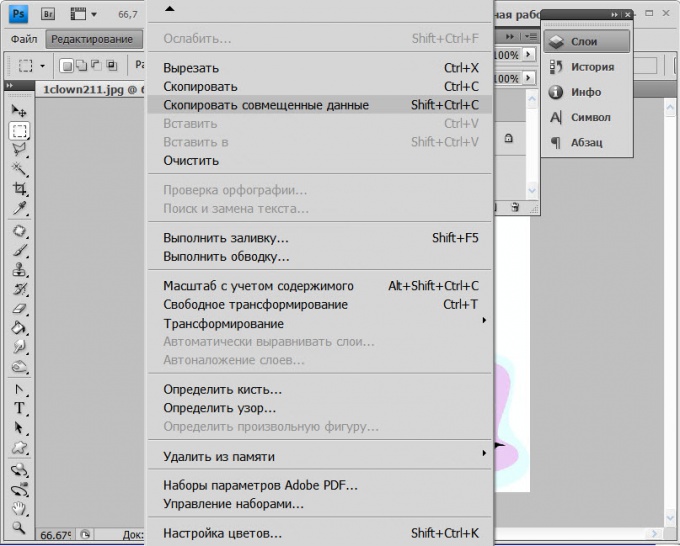
Select the image area using the selected tool, and then copy it to the clipboard. If the selected area contains an image that consists of several layers, open a menu in Adobe Photoshop in Editing" and select "Copy combined data. You can do without the menu - this command is assigned to "hot keys" Shift + Ctrl + C. If you are only interested in the part of the image that is hosted on one of the layers of a multilayer document, make sure that the layers palette is highlighted is the one that you need and select in the menu "Edit" the item "Copy" or use Ctrl + C. Also it is necessary to act, and if within a document there is only one layer.
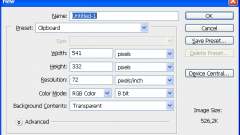
3
Create a new document. To invoke the corresponding dialog can be opened in menu "File" and select "Create", and you can just press Ctrl + N. In the Launchpad dialog will already be marked with the height and width that match you copied to the clipboard region, so just click "OK"button.
4
Paste the copied area in the generated document. This can be done by selecting visible in the section "the Edit" Paste command, you can press Ctrl + V.
5
Save the new document containing the image of the selected region of the original image. This can be done in the menu "File" select "Save" or "Save as". Hot keys that correspond to these commands - Ctrl + S and Ctrl + Shift + S. If you want before saving to choose the optimal ratio of quality and size of the generated file, then select "Save for Web & devices (Alt + Ctrl + Shift + S).