You will need
- a sheet of paper, ruler and colored pencils
Instruction
1
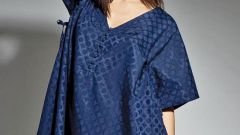
The drawing pattern of the blouse is divided into several parts. The back of the blouse. Draw a rectangle denoting it, such as ABC for convenience. Depending on your size and varies the size of the rectangle. For about 42 of the size of the required rectangle with a length of 45 cm and a width of 23 cm.
2
Marked by the rectangle point A, measure down 22, 5 cm and mark the point marked by the letter E and draw a line. This is the chest line on your next blouse. Then from point E, measure down another 20 cm Mark the point d, too, to draw the line. This is the waist line.
3
Neck. From point A, measure down 2 inches, mark that point with a letter, and then another 7 cm to the right, the point I1. Then you need to measure the width of your shoulder + 1 cm usivka.
4
Front blouse. The process is similar in many respects No. 1. Draw a rectangle А1Б1В1Г1. Its length should be slightly bigger than the back 49 cm, and the width of the rectangle is 26 cm away From the point A1, measure down 23 see Point E. From this point draw a straight ЕЕ1
5
Already from E1 put down another 19 cm, point designate by the letter D1. From point D1 draw a straight Д1Д. From point A, put the right 8 see It will be a point W, from which draw a straight ЖЖ1. All this will help to note the required lines and residual material for seams.
6
It is important to remember that all values are relative. To build the pattern you need based on their sizes. To do this you need to measure your chest, waist, shoulder width. And to correct the example, adding or subtracting the desired number of inches. Besides do not forget that when knitting blouse, so to speak, sit, so leave the joints more material.