You will need
- A computer running the Windows operating system, printer driver disk for the printer
Instruction
1
Turn on the computer. Connect the printer to the USB interface and turn the power on. Wait while Windows scans the connected device. After a scan, the system tells you that your device is connected and ready to work. To actually make the printer print computer still impossible. You need to install the driver.
2
Insert the driver disk for the printer into the optical drive of the computer. On the screen you should see "installation Wizard" software for the printer. If not, run the "installation Wizard" manually. Open "My computer", then click the drive (cd/dvd) right-click and select "Open". In the opened window look for the file "AutoRun.exe". Open this file. Now the "setup Wizard" will start.
3
Using prompts to install the driver. After the driver is installed you can start printing. Select to print the object and in the menu "File" click "Print". Printing starts immediately. You will be offered additional print settings. Can choose to print the text file in whole or individual pages. Choose color printing and other options.
4
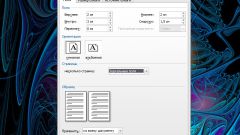
For best print quality you can select the file type to be printed. Such as "Color photo" or "Text document". If you are going to print in a format that differs from the standard A4, select the desired format from the menu. You can also select the media (photo paper, plain paper, etc.)
5
One of the options is "print Quality". You can choose the standard "Draft", "Quality image", etc. Select the mode you need. When printing starts, the process will be displayed in the window (the number of printed pages, the rest of the pages, etc.) If necessary, you can interrupt printing by pressing the command "Cancel".