You will need
- angles, pipes, connections are made using nuts and bolts
Instruction
1
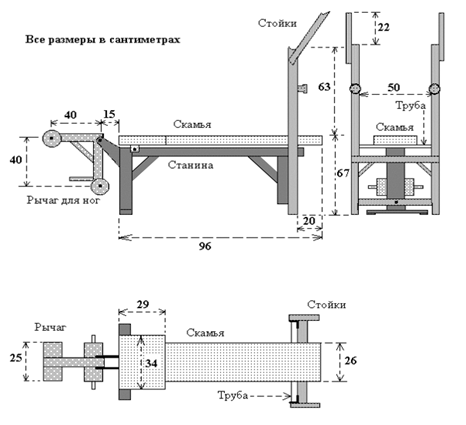
The Assembly happens. Install the base frame in position, expand the crossmember on the left column by 90 degrees (see drawing).
2
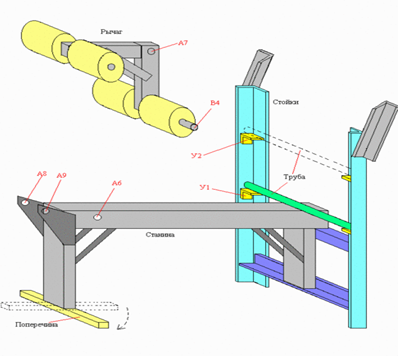
After that, lift the right part of the frame, move it under the upper crossbar of the uprights. In the upper part of the vertical bolts B1, B2 will enter the corresponding holes of the crossbar (A1, A2).
3
Then press the lower crossbar of the uprights from the bottom to the right column of the frame so that horizontal bolt B3 into the hole A3 of the crossbar, tighten this bolt with the nut welded to the handle. Now the bolts B1, B2 will not give the posts to pivot in a vertical plane, and the bolt B3 will not allow the struts to bend as the frame is raised relative stands.
4
Put on the bed of the bench so that the holes of mounting angles of the bench (A4, A5) corresponds to the opening A6 in the upper left part of the frame, and insert the metal rod into the holes.
5
Lift the right side of the bench and move it under the steel tube, laying it ends at the special angles that are bolted to the uprights on the inside. These two parts of the pair: U1 is the bottom, use them for the horizontal position of the bench, and U2 – top to inclined position. Thus, the right side will rely on this tube the part that is reinforced with corners.
6
Loading bench goes down and in an inclined position and right, that is, the pipe will be clamped between the walls of the stands, bench and bottom corners. The design allows to assemble and disassemble the simulator for a couple of minutes without tools.