Instruction
1
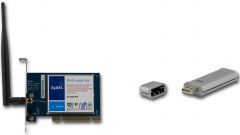
If the Wi-Fi setup is running on a new computer, you need to install the drivers for the network card with wireless access. Just go to the website of the Board manufacturer and download the appropriate files, using the control resource.
2
Run the downloaded file on your computer and install them using the instructions on the screen. After completion, restart the computer.
3
If the driver installation went without problems, in the lower right corner of the Windows you will see the icon, which is an indicator of connecting to a Wi-Fi network. To connect to a specific access point, click this icon and select the access point from the list available. If necessary, enter the password point and press Enter.
4
If the connection has been made, you will see a corresponding notification. To view the amount of data transmitted over the network, and the status of the wifi you can click the right mouse button on the name of the connection that is currently active, and select "Properties".
5
Configuring the connection parameters to access points can be adjusted via the "control Panel" in "start menu". Open this menu and then go to "control Center network and sharing" - "Change adapter settings". Double-click the left mouse button on the icon "Wireless network connection". Click on the "Properties" and view the current connection settings.
6
To edit settings for the selected access point in the appeared window select the "Security" tab. Here you can enter a new password for the connection, to specify the type of encryption and security.
7
To manually add an access point Wi-Fi you can use the "control Center network and sharing". To do this, open the section by using the control panel and select "Manage wireless networks". In the window that appears displays a list of used networks. To add your own points then press "Add" and follow the instructions on the screen.