You will need
- You need only a little knowledge, desire, photo processing with Adobe Photoshop CS5 (and earlier versions).
Instruction
1
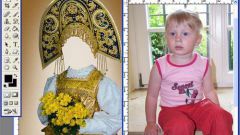
Open the desired photo in Photoshop. Carefully inspect the face and mark for yourself what you want to change. Double click on the layer thumbnail to unlock it. Name this layer "original". Create a copy of this layer and name it "1".
2
Click on the "create new layer", name this layer "changes". On the layer "change" the hard brush of small size, circle all the places you plan to change (ears, eyes, etc.). This layer need to turn on and off to see if all you changed.
3
Go to layer "1". Go to filter → plastic (you can call this filter keys Shift+Ctrl+X). Choose the tool "warp". Install a comfortable size, density, and pressure of the brush.
4
Now you can change at your discretion. For small parts of the face (eyes, eyebrows, nose, lips), use a smaller brush. This will allow you to more accurately change the form. Try gently lifting the corners of your lips – you will smile. For larger parts (cheekbones, chin, forehead) take the brush bigger. This will help you avoid the bumps and unevenness on smooth surfaces.
5
To undo your last action, press Ctrl+Z. If you need to restore the full plot, use the tool to "reconstruct". When the person take the desired form and the expression, click OK.
6
You can now change the color of the eyes. Create an adjustment layer "curves". Change settings of each channel, to obtain the desired color. Pay no attention to the fact that the whole picture changes color. Should only be for the eyes.
7
When the color obtained in the "menu mask" click "invert". Now take a white brush and a very neat and precise movements help the eyes. You will see that the eye acquires the desired shade. Can slightly reduce the opacity of this layer to make the picture look more natural.
8
You can now change the color of the skin. Create an adjustment layer "hue\saturation". Move the sliders until the desired skin tone.
9
In the "menu mask" click "invert". And now use a white brush paint the skin. You will see that the person acquires the desired shade.
Now our photo is ready.
Now our photo is ready.
10
Make sure you changed everything you wanted. Now you need to disable or delete a layer "changes". Save the resulting image.
Note
In this simple way you can create a totally fantastic faces of different shapes and colors. From friend to alien. Bring your creative ideas and good luck.
Useful advice
Don't forget to disable or delete the layer "modify", otherwise the saved image will be visible to all your notes.