You will need
- - Photoshop;
- photography.
Instruction
1
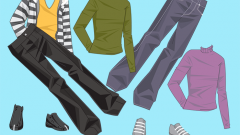
In the graphics editor option to Open the File menu open the picture you want to work with. If you are going to change your appearance by changing clothing or hairstyle, apply templates, which are easy to discover and download to your computer from the Internet resources related to graphic design. In order to keep the background picture without changing, pick a template in png format containing the image of clothing or hairstyles on a transparent background.
2
Paste the contents of the template into your document. This can be done by opening the file with the clothes in a new window, highlighting the contents of the option menu Select All and copy using option Copy Edit menu. Switch to the window with my picture and insert a layer from a template option Paste the same menu.
3
With the option Free Transform Edit menu, adjust the size of the template in your photo. If the inserted clothing or hairstyle much less of the picture, make the photo editable. Apply for this option Layer from Background, which can be found in group New menu Layer. After turning the background into a normal layer, reduce its size. The template may not match the shape of the face or the figure in the picture. For a precise fit the pasted image, use the Warp option Transform the group Edit menu.
4
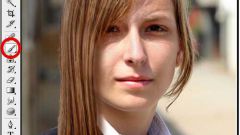
To make changes to their appearance in the picture can be using the makeup brushes that are easy to find on the Internet resources, and templates. Turn on the Brush tool, open the brushes palette and open the menu by clicking on the button in the top right of the palette. Select Load brushes and select the downloaded brush, which is a file with the extension abr.
5
Option group Layer New Layer menu add layer to document with a photograph. As the main color select the color appropriate for the kind of makeup you have chosen. In the brushes palette click on the pattern just loaded the brush and use it to make an imprint on a transparent layer. If necessary, reduce the size of the established footprint and move it with the Move tool to place the picture where it will look most realistic. If necessary, change the slope image created brush makeup, by choosing Rotate from the Transform group Edit menu.
6
With the help of brushes, you can change eyebrows and eyelashes. If customized according to the size of the imprint of the brush does not completely covers the eyebrows or the eyelash on the original photo, to a file, add another layer, turn on the tool Stamp Tool, selecting the option to Sample all layers in the tool options bar. Working on a transparent layer, click the tool on the part of a picture, copying that, you will be able to close eyebrows or eyelashes on the pictures. Hold down when selecting the copy source Alt key. Paint the extra details in the picture, letting go of Alt.
7
A more radical change of appearance is possible with the Liquify filter. For its application highlight the area you want to edit, Lasso tool and copy to a new layer. If you are going to correct a fragment, which have already made changes that are on different layers, use Ctrl+Alt+Shift+E, and copy processing to the fragment created in this way a new layer.
8
Open the filter settings option menu Liquify Filter. With the tools in this filter, you will be able to move pixels constituting the image within the limits of the selected brush. To cancel the edits made to the image, use the Reconstruct Tool.
9
Under the Liquify can get parts of the background. Turn on the Erazer tool and erase them deformed fragments of the background on the layer to which you applied the filter. The parts of the shapes that become visible after this operation, close the pixels of the background using the Clone Stamp tool.
10
Save the image in jpg format option the Save As menu under the File name not matching the name of the source photos.