Instruction
1
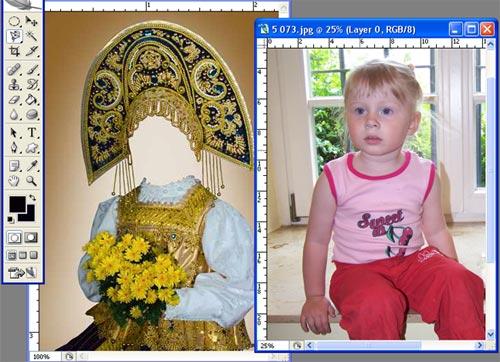
Download from the Internet a template of a suitable costume, and then open it in Photoshop. Behind him, open the photo from which you want to take the person to insert into the template. Most of the templates when opening, you can see layers with elements of the costume to display them, set the visibility of all layers, opening the layers palette (Window>Layers).
2
Go to the window with your photo. On the toolbar on the left select the Lasso Tool and trace the General contour of the head in the photo. The exact contour on a contour do not necessarily capture a bit of the background around the head. Then press Ctrl+C to copy selected area. Go to window pattern suit and press Ctrl+V. the Part of your photo will appear as a new layer in the template.
3
Select the layer with the facem and using the mouse drag it to the palette so that the person was under the hair or headdress is available in the template. Then edit the position of all other layers, ensuring that the head and neck from the photo in the end was behind all the other elements of the costume.
4
Now the size and position of the face needs to adjust to the face was proportional to the template. On the toolbar, select the move tool and then click on the faceto open the border editing.
5
Clamping the left mouse button to guide the points of the boundaries, change the size of the face horizontally and vertically, clicking the icon that looks like a paperclip on the top toolbar, next to the letters WH.
6
Without releasing the left mouse button, continue moving the face and resize it, yet the person will not be proportional to the figure in the template, the hairstyle and the headdress. If necessary, change the rotation angle of the head, also moving the face using the move tool. Apply the transformation.
7
Also change the shape and position of the face, causing the transformation tool, Ctrl+T. If necessary, slightly change the size and angle of the hats or hairstyles by clicking on the corresponding layer.
8
Now you need to erase extra pieces of background around the face to finalize the photo. Go to the layer with the facem, click on the toolbar eraser (Eraser tool), set it to hardness 0% and gently wipe off all the excess, leaving only the contours of the face.
9
After that, merge the layers by right-clicking on the top layer and selecting the option Flatten Image. Save your finished photos in JPEG format.