Instruction
1
If the drive is installed in the computer before you move any jumpers, shut down the operating system, power off the computer, remove the hard drive ribbon cable and power cable after memorizing their position, and then remove the drive itself (without this you will not see it located on a sticker).
2
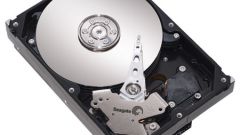
Check out images on the sticker. If you have a hard disk with interface IDE, this label is usually given three diagrams of the location of the jumpers: for the modes "Master", "Slave" and "Cable select". Sometimes there is a fourth illustration showing how to put the jumpers in order to artificially reduce the amount of storage to 32 gigabytes (this is necessary to work with older motherboards). In the Linux operating system to use this mode is not normally needed even when using such boards, as it runs with hard drives directly.
3
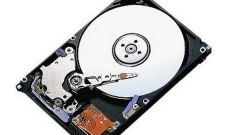
Themselves jumpers locate on the same side wall as the connectors. To determine where the the field to set the jumpers is the top, on landmarks, which are usually also shown in the figure. This landmark can be, for example, a missing conclusion.
4
Sami jumper move with the help of tiny pliers. Sometimes one storage configuration requires fewer jumpers than the other. So if you have an extra jumper, and save them, because in the future you may want to take it back.
5
In very rare cases, a sticker with a picture on the drive is missing. In this situation, report the model of the drive in a forum frequented by experts on repair of hard drives. Ask them to give the layout of the jumpers on the drive that model.
6
When on the same cable there are two devices (either hard drives or optical drives), should either one of them to select "Master" and the other "Slave", or both, select "Cable select".
7
The drives are SATA modes "Master" and "Slave" do not exist. The jumpers they have designed for other purposes. The most common jumper to reduce the data speed from 3 to 1.5 gigabits per second. They are designed to ensure compatibility hard drive on older motherboards. Sometimes there are jumpers that control power saver mode. Their purpose is almost always listed on the label of the drive.
8
Changing the position of jumpers, install the drive into place with the tab down, pin it, then connect the cables in the same way as they were connected before. Turn on the computer and verify that all drives are healthy.