Instruction
1
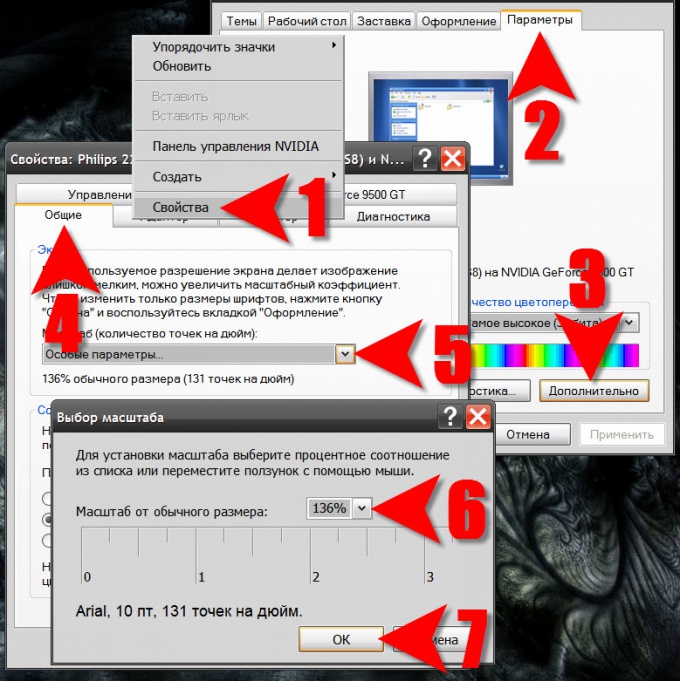
If you are using Windows XP, begin with clicking right mouse button on a free from shortcuts and open Windows, the desktop space. In the context menu that appears, select the bottom item is "Properties". In this way, the operating system opens the display properties window.
2
Go to the Settings tab and click the placed in the lower right corner of the "Advanced"button.
3
Select the zoom factor drop-down list on the General tab - it opens by default. If you put here does not work, select "custom settings" and the OS will open for you new window.
4
Select a scale or type, in this field its value. In addition, you can adjust the size visually, compressing or expanding the timeline with the mouse while pressing the left button.
5
Click "OK" when the sample text in this box will satisfy your requirements to the font size. The OS will show a message stating that the changes will take effect after the installation of additional fonts and restart - click "OK". If the desired font is already in the system, then the OS will report it - click "OK" again.
6
If you are using Windows Vista or Windows 7, click on the "start" button and select "control Panel".
7
Click in the panel that opens the link in the "appearance and personalization" ("Appearance" in early versions), and then choose "Screen".
8
Select scale from the options provided or click on "font size" in the left pane.
9
In the window fine-tune the font scaling it is exactly the same as in Windows XP - you can choose the appropriate value in the dropdown list, enter its number from the keyboard or pick up the scale by manipulating the scale with the mouse. Getting the right size, click "OK". The window closes and the list of scaling options will be added.
10
Click "Apply" and the OS will ask whether to reboot the computer immediately to effect the changes or you can wait for the next boot computer, select the desired option.