You will need
- Photoshop, picture, broken into layers.
Instruction
1
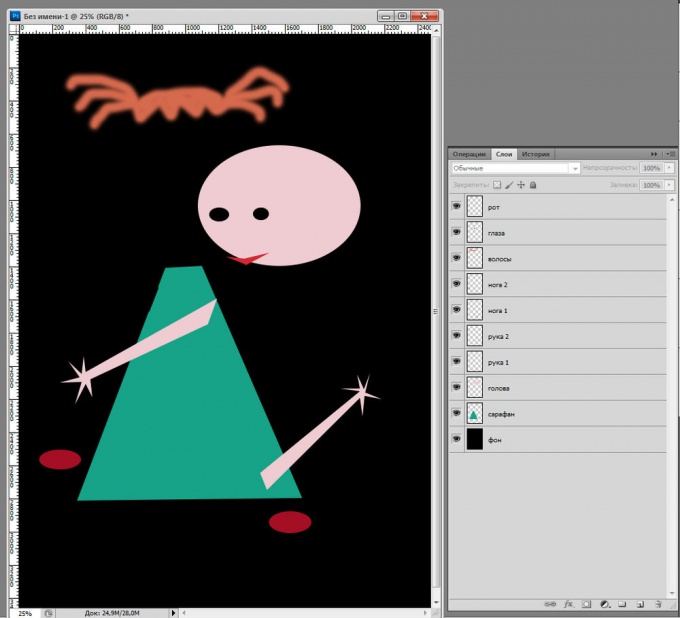
In the illustration you can see that the picture is divided into many layers, not merged with each other. They are all named according to the items that they depict. Each layer can be adjusted and move around independently. Ie, right hand, for example, you can move to another place, redraw, delete, add effects, recolor. And all this does not affect other parts of the body of our "girls".
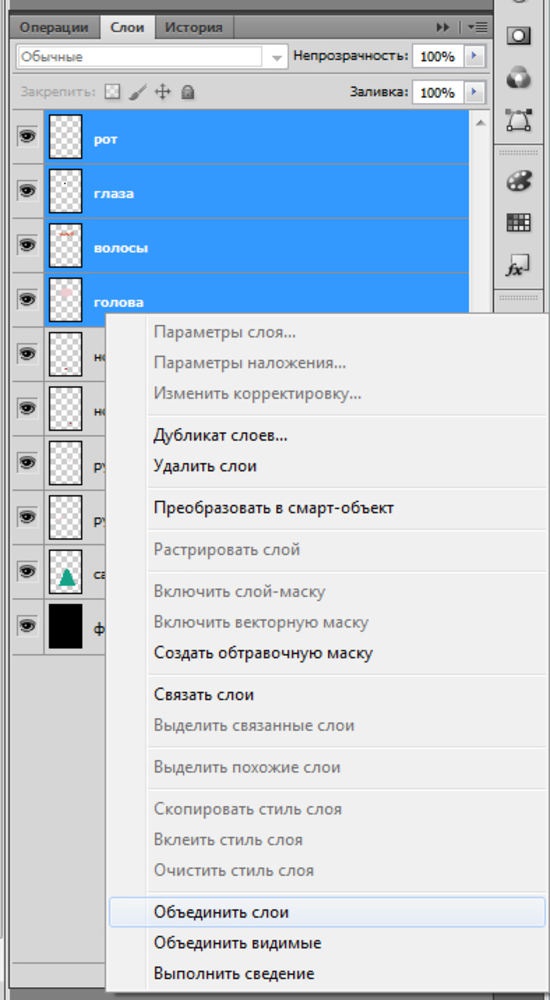
2
But if you already brought all of the head to perfection, there is no point to keep them on separate layers. Combine we need layers. Arrange all the pieces in place. Hold down the Ctrl key and select all necessary to merge layers (in our case is the mouth, eyes, hair and head). Now click on any of them with the right mouse button. A menu will appear where at the bottom you should select "Merge layers". Now the head and all that goes with it, have merged and become one element. Rename this layer and name it "head". This is the first method of combining the layers.
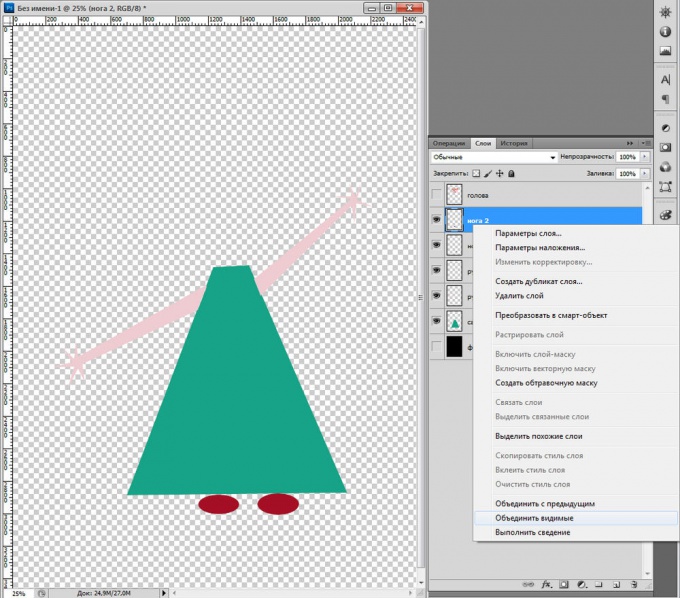
3
Now you can go the other way. This time we must unite sundress, arms and legs, i.e. to create the torso. Disable layers "head" and "background", removing his eyes from the window next to the layer. Click on one of the visible layers, right-click and select the menu item "Merge visible". Those layersthat have not been disabled, will merge into one. Name this layer "body".
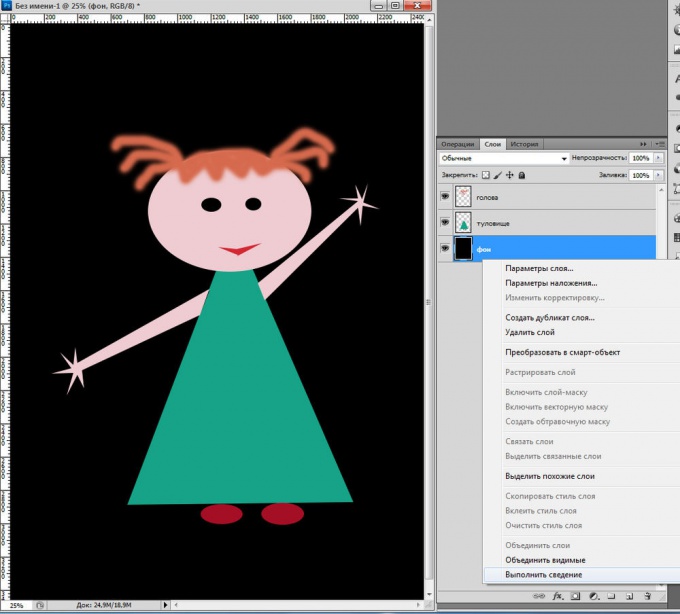
4
Was the last method is called "Mixing". It is used as the last step of the image. "The mix" brings together all layers of the document and fixes them. Turn on the layers "head" and "background". Click the right mouse button on any layer and select the menu "flatten". Now the image is connected. It is necessary to reduce the weight of a psd file.
Useful advice
Do not merge layers if there's any chance that you still may need separately.