You will need
- - Adobe Photoshop
Instruction
1
Launch Adobe Photoshop and create a new document. In the process of creating a think, what type will be your flyer (landscape, portrait or square), and depending on this, fill in the fields Width and Height. The format and the theme remains, of course, at your discretion, but in this tutorial will describe the process of creating flyers in book format, on the topic of harm of Smoking.
2
3
Using the Horizontal Type Tool (T or Shift+T), create two layers with inscriptions in capital letters "Smoking" (color 7d6125) and "kills" (white color). The font is Trebuchet MS. Use the command free transform (Ctrl+T) enlarge the inscription "kills". Create a border for each label. To do this, click the right mouse button on the layer and select Blending options and click Stroke. Size of border: 3 px, opacity: "kill" - 30% "non-Smoking" - 14%. Place both labels as shown in the picture. Create another strip next to "kills" of the same thickness and color as the bars at the top and bottom of the leaflets.
4
Using the Rectangle Tool (three rectangles) to create the background behind the words "kill", but not with inscriptions "Smoking". Create 6 labels size 40 and font Trebuchet MS: "According to", "statistics", "Russia", "smoke", "over 3 million", "teenagers". Place them under each other in the center of the leaflets. Below, create another band of color ffbd5f. This Welt and the bottom strip thin strips of color ffee5f.
5
6
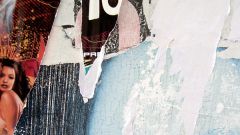
Using the Ellipse Tool (U or Shift+U) to create around the label, "According to statistics, in Russia smoke more than 3 million teenagers" something similar to cigarette smoke. For this ellipse with the ellipse in an arbitrary order, close the inscription. Then for convenience put all the layers with the ellipses (select them, click them, right click and hit Merge Layers).
7
Click on the newly formed layer, right-click and select Blending Options. In the Stroke tab, create the gray border for this layer size of 2 pixels, and in the tab Satin, twisted the sliders, give the layer the appearance of smoke. Create two more copies of this layer, place them below the original. Command free transformation increase both copies. As a result, you should get something like this.


