You will need
- - sheets of plywood (4-5 pieces);
- - jigsaw;
- - sandpaper;
- circular saw;
- - colourless varnish;
- - material for upholstery;
- bolts;
- - screws;
- - the drill.
Instruction
1
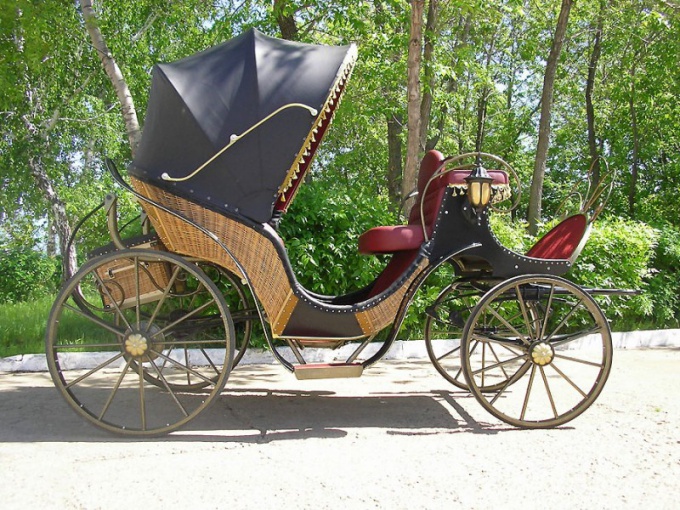
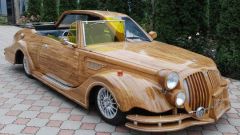
to make bкарету/b from anderea/em" class="colorbox imagefield imagefield-imagelink" rel="gallery-step-images"> Take a sheet of plywood (because the coach is a product of the street) size 9x2500x1250 see Mark sawed it into three parts so that the sizes of the two were 1250x700 cm, and the third 1250x1100 see
2
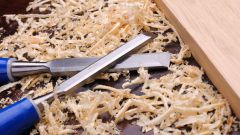
Saw all the parts on the drawn contour. Mark and carefully cut out doors and Windows. In the process of cutting out doors to save material drill in the corners of the hole, and then proprivate using a hand fret saw (about 0, 5 cm). Then you can continue to work with the jigsaw. This will give the possibility of using sawn parts in the further manufacture of the carriage.
3
Get two smaller pieces of plywood in half, later they will be glued together. It is important that the inner part was slightly smaller than the outer: this will allow to lean on them front and back wall, and doors and Windows. Glue the resulting pieces together. For this purpose you can use PVA glue. The more clamps you have, the better, but should have no less than twelve pieces.
4
Once glued to the sides, glue the ceiling and the bottom of the carriage. Distance between the uprights should be such that they rest on the edge of the front and rear walls when gluing the front and the back. Twist the rack with screws and screwdriver, simultaneously aligning the notched parts among themselves, as they will rely on both walls.
5
Go to the front and rear walls. Their sizes are easy to identify: use the normal roulette. Make Windows like you like. The only point to consider is that the anterior wall is the seat of the coachman: you need to leave space for him.
6
On the back wall make the window slightly bigger than the sides, because there will be seat passengers. Windows already cut out and glued to the walls (for this, use a circular saw). The optimal interval between cuts is fifteen inches. The depth should be equal to approximately six centimeters.
7
The body is ready, go to the manufacture of the frame. Take the glued shield (or two of plywood 18 mm thick) of size 400х1500мм. Transfer it to the drawing frame and saw. Finish the edges with sandpaper. Take one of the leftover material and give it a size 400x455 mm. With it, you connect the preceding details between themselves.
8
Prepare the site for the rear of the Luggage and the driver. Each of the sidewalls fabricated lining. To begin, draw the bottom part cut out. Attach it to the sidewall, departing from the bottom of the nine, draw the top part. Cut out, glue the finished lining on the inner part of the sidewalls. In the future they will need for the manufacture of floor and protect the bottom. For the back use the second segment of the shield. Cut it down to size, one edge sloping (45 degrees).
9
Drill holes in the lateral parts of the items received. For the side bracket holes use the drill to drill under an angle of 90 degrees. Put the detail in place and loosely tighten the three screws from different sides. Use the remaining holes as guide and the bottom of the carriage. Put all the glue, attach with screws and clamps.
10
Proceed to the production floor to the coachman. Prepare two sheets of the plywood sheet: size 290х350мм the first and the second 290х500мм. Cut the last sheet to a depth of 6 mm with the interval of 15mm to 300mm length. Put a large sheet using clamps. Grab a sheet several screws for greater reliability. Stick on top of small sheet, glue the bandwagon from pre-sawn boards.
11
Do the Windows and curtains on doors. For this purpose, you need a thin plastic. As it is sold in rolls, you will need to flatten it, dipping in boiling water. Saw out and grind the bars for doors and Windows with the jigsaw and sandpaper. Insert the window and doorway.
12
For the upholstery of the seat, hold stuff (velvet paper). Cut a template from hardboard, glue them on the matter. Trim it with the stock. Secure edge construction stapler. Make the same way all of the side wall.
13
Proceed to the manufacture of wheels. Buy glued in size 500x200 mm. Sawed it into four pieces. Two piece cut out circles with a diameter of 450 mm for the rear wheels. The front wheel diameter will be less than about 250-300 mm.
14
Apply another circle on the circles (400 mm) and a small circle under the hub (the eye). Divide the circle into 10 parts, using the protractor. Draw two circles in the area of future spokes (equal segments above and below). Draw spokes with patterns.