Is it possible to avoid accumulation of dust in the laptop
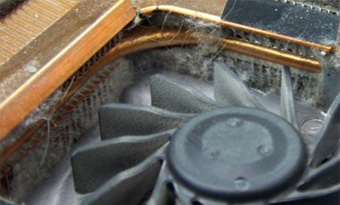
Large dust accumulation prevents air exchange that leads to overheating of the computer. Also in contact with synthetic fibers and wool can be more tragic consequences, including a failure of the system. Laptop users should remember that to prevent dust from entering the electronics will not work. Tiny particles of sand, hair, wool, etc. will always find a way to get inside. So cleaning the laptop from dust should regularly, about every six months, when you use a computer in more polluted conditions, and more.
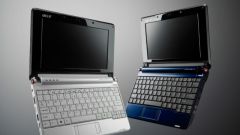
To reduce the ingress of rubbish into the device, you must use covers, bags for storing and carrying laptop. Clogging does not depend on the device model, it is influenced by operating conditions. But still it is worth remembering that some unscrupulous manufacturers are not paying enough attention to the installation of dust protection. So do not buy HP laptops manufacturers and Chinese NEC.
When the laptop it's time to clean
If the machine starts to make noise and overheat more rapidly than before, to turn on and off without your intervention, you should think about immediately cleaning the notebook from dust. Of course, it is best to take the device to a specialized center for rendering of such services. They have more experience, and warranty card provided. If this is not possible, you have to clean the laptop from dust alone. This requires the following simple tools:
- a hard brush, preferably with natural hair;
- screwdriver (flat or Phillips;
- cotton swabs;
- pure alcohol;
- compressed air or a syringe;
- thermal paste.
Of course, wet cleaning should not be here. So you should wear rubber gloves that will protect the device from moisture and grease.
How to crack a laptop
To begin cleaning you need to open the laptop. On pages of the Internet one can often find the instructions on cleaning the laptop without disassembling the device, and just use a vacuum cleaner and blow out all holes, but there was a little. So have to disassemble, take a screwdriver and dismantle.

Each model is revealed in different ways. In some instances, the ventilation system is located directly under the lid, in others it is hidden. All that out pretty easy, but is something to remember:
- any actions concerning the disassembly is performed at the full de-energizing;
- all operations carried out without the application of effort;
- the screws are different lengths, remember where as this reason;
- if fasteners are not visible, you will have latches that are very easily broken and to repair them is impossible;
- reluctance to latch-UPS used without power, but small caliber flat screwdriver.
How to clean a disassembled laptop
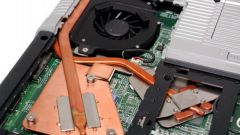
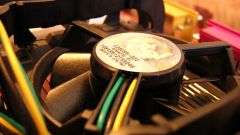
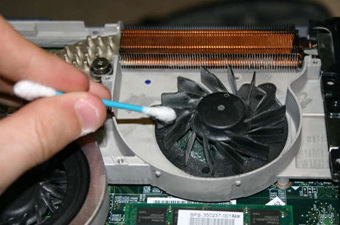
When the device is disassembled and ready to the procedure, the process of cleaning the notebook from dust begins with the fan blades and the radiator fins. To clean the cooler depending on its design - right on the spot or after disassembly. Less advanced users can be limited to only removing the fan: it is attached pretty easy on normal screws.
The particles of dust between the fan blades is removed by cotton swabs or compressed air. Blow the fan with the mouth is not necessary, since particles of moisture can get into the system. It is also not necessary to follow the advice to clean the fan under the faucet, confidence in the tightness of the compartment bearing never.
If you clean the radiator without removing it, the procedure is similar to that described above, only the air flow from a container or syringe should be directed in the direction of the duct. If these items cannot be retrieved strong jet of air, then use the brushes, cleaning them of dust from the radiator fins. In any case do not let the appearance of a white plaque, it can occur due to the reaction of moisture with the air, and useful in this does not.
If you do decide to remove the radiator, which is much better for cleaning, it may be necessary to change the thermal interface on the GPU and the CPU. When disassembling, do not force, but gently turn the design, carefully destroying cemented thermal grease. It is also necessary to carefully remove the white and dead traces from the soles of the cooler. The best way to approach the alcohol and cotton wool.
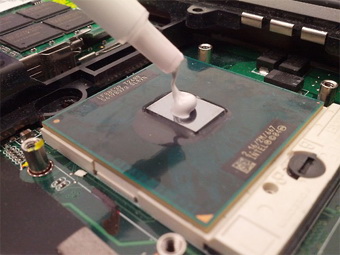
And now, when thermal grease is removed, apply again and a thin layer using a dispenser. Then immediately sent the radiator into place. Tighten bolts tight, often the sequence of tightening is indicated by the numbers, so follow her. After that, clean the laptop from dust remains not so a lot of things. The air in the balloon blown all the ports, outlet ports and keyboard. It should also be borne in mind that the dust sits back, here the vacuum cleaner is not hurt. Only vacuum the dust particles collected is not part of the notebook, and in the air, swept away by spray or brush.
Finish line
To clean the laptop from dust, in any case, do not use wet wipes and some cleaning products. Now it remains only to assemble the device. The most difficult thing now is not to leave anything extra. The dust from the keyboard, monitor and the lid is removed, dipped in alcohol or specially intended for these purposes with a napkin.
If cleaning the laptop from dust every six months, it will last quite a long time, quite possibly before the time when the owner admits the model is clearly outdated.