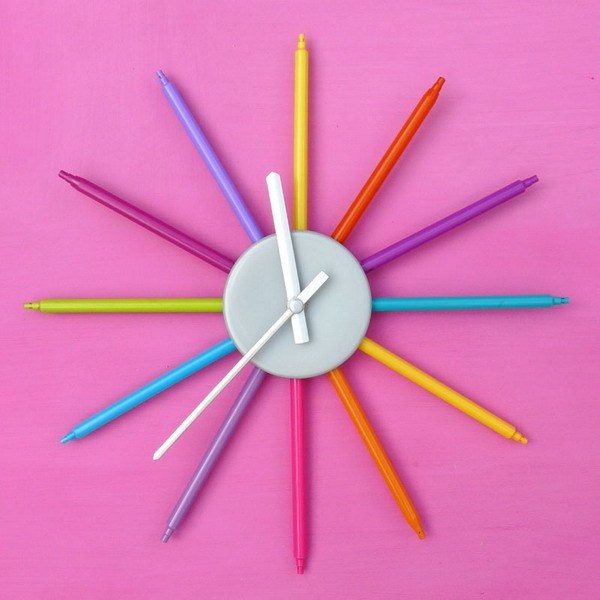
Wall clock made of markers
For the manufacture of children's wall clock will need ready clockwork with arrows that you can buy in stores of goods for needlework; used markers and a round plastic cover. With the help of pliers from the pens and remove the stem and the container with paint, leaving the empty shell. The colours of the buildings it is desirable to choose bright, vibrant and in harmony with each other.
Using tailor's meter and measure the circumference of the plastic cover, divide it into 12 equal parts and mark them with a pencil. A thin drill of diameter slightly less than the diameter of the marker holes on the sides of the cover and at its center. As an alternative, you can use a heated nail. Fine-grained emery paper smooth out all the irregularities of the resulting holes. In hole insert case markers, harmoniously matching them by color on the reverse side of the cover and place the clock mechanism, fixing the arrow on the gear with a Central hole.
Pencil
Beautiful, bright and original pencil can be done on the basis of any plastic container: rectangular or round. To do this, the old markers are necessary to cut the tip of the rod: it is best for the job suitable electric wood burner or a portable soldering iron with an attachment for cutting. After that from the body of the marker and remove the container of paint.
With heated on fire a nail or a thin awl on the sides of the body of the marker, make a through hole. Locations for holes should be marked with a ruler and marker all markers holes are at the same height. The body of the pen is applied to the plastic container and at the same height where his holes, affix the label and make two holes on the lower and upper edge of the jar.
On fishing line or thin wire strung through their pens in the top and bottom of the hole, trying to beautifully match the body color. After this, the tank is wrapped the resulting design, the ends of the fishing line threaded through the holes into the banks, tighten and carefully knotted. Ready pencil can be decorated with a bow, a small applique, paper flowers.
Lamp
For the manufacture of lamp-night lamp need a lamp receptacle and a wire with a switch, which are sold in DIY stores. The pens cut the tip of the rod, then glue them collect from the well: laid in a square enclosure, put the remaining markers, leaving a small distance from the edges. If you don't trim off the stem and use pens with caps, it is possible to make wider the lamp.
The height of the light should be such that the lamp is screwed into the cartridge, not peeking over the edge of the lamp. Inside the structure at the desired level by means of glue fixed two of the marker, which will serve as a stand for the cartridge. Cartridge secured by clamping rings, after which it screw in a light bulb. It is important to remember that this lamp can be used only with energy saving lamps that heat up a little and can't melt off the walls of the lamp.
