You will need
- - a few digital photos;
- - the installed program Adobe photoshop.
Instruction
1
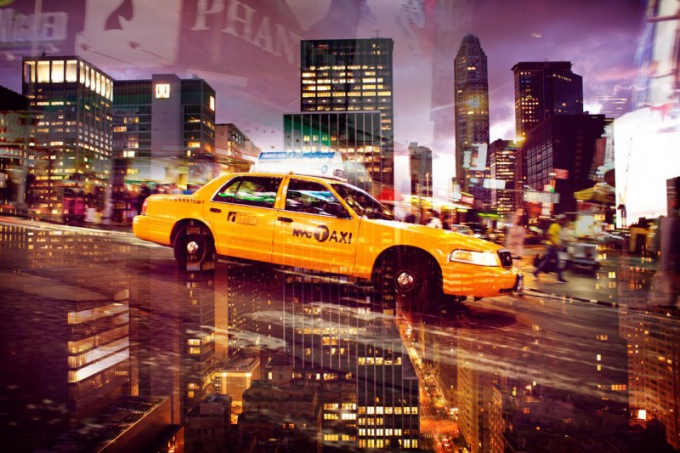
Select two photos to combine. Remember that the most impressive look image, in which light elements of one layer are superimposed on the dark areas of the second. Often multiple exposures using portrait and some landscape.
2
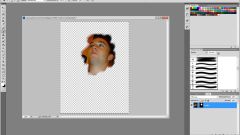
Open in Photoshop first of the selected images. Click on the File — "File" and select the menu command Place "Place". In the dialog box, specify the path to the file with the second image.
3
The easiest way to make a multiple exposure — set the second layer's blending mode to Screen — Display. To select this option from the drop-down list at the top of the Layers palette— Layers.
4
Depending on the photos possible to use other blend modes. Try to apply, for example, Lighter — "Lighter" or Soft Light — Soft light. If the image is light, use the Multiply mode is "Multiply".
5
If you want to scale the layer, click the shortcut CTRL + T (they call free transformation). Hold down the Shift key to keep the aspect ratio and moving the corner handles, adjust the size.
6
Using the sliders located at the top of the Layers panel— Layers, adjust the opacity of the top layer (parameter Opacite). If you want to hide some parts of the top image, create a layer mask. Click on the Add layermask icon— "Add layer mask" at the bottom of the Layers palette.
7
Take a black soft brush and now paint all the unnecessary region. Make sure you draw it on the mask not the image icon of the layer mask that appears next to the thumbnail of the layer, must be enclosed in double frame. If you made a mistake and painted over the extra sections, change the brush color to white and adjust the result.
8
To translate the captured image into black and white, click on the icon Great New Fill or Adjustent Layer "New adjustment layer or layer-fill". It is located at the bottom of the Layers palette. Select from the drop-down list command Black and White — "Black and white".
9
You can leave the default settings, choose one of the installed presets or adjust the image by moving the sliders and watching the result. If you put a checkbox in the Tint— the Hue, you can get various options for color-coding. Double exposure ready. Multiple exposure consisting of multiple images is done on the same principle and is used to create unusual and fantastic effects.
Useful advice
Remember that black areas on the mask to hide part of the layer pixel and the white open. Using a gray brush, you can make a separate region translucent.