Instruction
1
To change the volume required to "degrade" the quality of the image or picture, but this "impairment" will not be noticeable when viewed on screen or in printed form. For the quality of the computer generated image meets the format and quality level (quality), which is measured in percent.
The most compressed formats that have the least amount of formats JPG (JPEG) and PNG, and PNG does not have settings for “quality”. Have PNG there is only the setting of bit mode (256 – bit by default, equal to 100% quality in JPG format, but in the amount can win it).
Also very large resolution on a normal monitor too, to anything – therefore pointless to use as Wallpaper or stored in the home archive images, for example, 6000x8000 pixels, if the screen resolution is 1920x1280. Of course, higher resolution allows you to enlarge small objects in the photo, but if you are hesitate computer graphics professional, the picture resolution can also be reduced to free up space on your computer's hard drive.
2
To change the format, the visual quality and image resolution will help free program Paint.NET. Paint.NET is not a product that comes with Windows, unlike regular Paint. Paint.NET can be downloaded for free on the Internet, the program is constantly updated, supports Russian language, and has a nice interface. Distribution Paint.NET weighs about 100 times less than the distribution of Adobe Photoshop, so the program downloaded quickly and take up almost no space on disk.
3
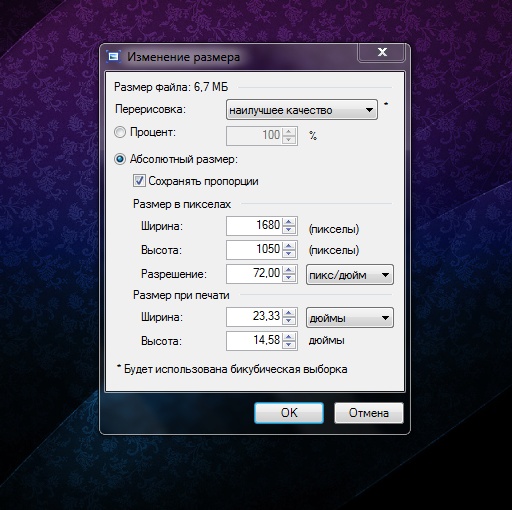
After starting Paint.NET drag the graphics file in the working window of the program. The picture opens in the editor. To change permissions, select the top menu "Image" - "resize". In the appeared window adjust the resolution of the new image to your taste. Don't forget to tick the "Maintain aspect ratio". After entering the desired resolution, click “OK”.
4
Now we need to change the image format and the level of “quality”. To do this, select all in the same top menu "File" - "Save as". Enter a new file name and select file type “JPEG,” then click “OK”.
A popup window will appear asking you to specify the quality. On your right, you will see how to visually changing the image quality (preview) and final file size. As you can see, between the quality of 100% and 95% in JPEG format is almost not distinguishable to the human eye the difference and it allows you to save disk space. After setting up the level of quality click "Save". The image is saved.
A popup window will appear asking you to specify the quality. On your right, you will see how to visually changing the image quality (preview) and final file size. As you can see, between the quality of 100% and 95% in JPEG format is almost not distinguishable to the human eye the difference and it allows you to save disk space. After setting up the level of quality click "Save". The image is saved.
Note
Try to save the image in PNG format and compare the sizes of received files.