Instruction
1
Start Microsoft Word and load the desired text, if you adjust the position of the picture should be in the document in this format. If the image is not yet inserted into the text, set the input cursor to the desired position and click on the "Insert" menu of the text editor. In the group of commands "Illustrations" placed the icon "picture" - click it, then in the opened window, locate the image and click "Paste".
2
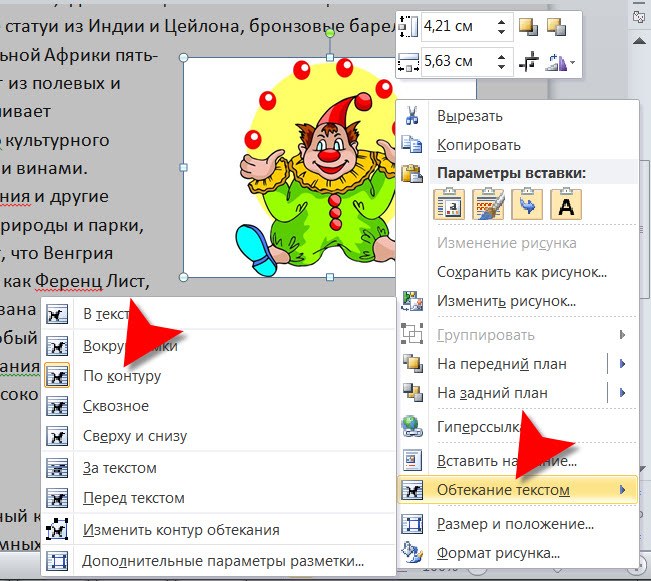
Click the picture in the text document, right-click and from the context menu, expand the "text Wrapping" (you can do this by pressing "M"). Some are placed in this section of the alignment options allow you to put a picture in the desired position. By hovering over each menu bar, you will see how it will change the image position in the text if you select this option. Click, for example, the string "loop".
3
Drag and drop the picture to the left or right edge of the page and the operation to be completed. Save the document.
4
If you need to insert a picture into your html document, then ask wrap its text, for example, by using the align attribute of the img tag. With just enough to display pictures set of attributes, this tag can be written as:
<img src="image.png" />
Here in a single src attribute indicates the name of the file containing the image (image.png). To set the wrap image text on the right, add the align attribute with a value of left:
<img src="image.png" align="left" />
If you want the text wrap the image to the left, the value of left, replace on right.
5
If you have the ability to use the editor html pages, which provides the visual mode, you should edit the code to add the tags needed attributes is not required. In this case, you can click the picture and then click insert image on the toolbar with the control buttons of the editor. In the opened window should be a drop down list with options for centering images - select the desired line (left or right), and then save the edited page.