You will need
- - plywood;
- glue EAF;
- - paint;
- small bearings;
- - propeller.
Instruction
1
Before you build a weathervane, make a simple drawing. Decide on the size of the device, when designing moving joints follow the dimensions of the bearings. Consider the maximum wind speed at which the vane will work, and planting details of appropriate thickness.
2
Cut all the necessary parts from thin plywood. Of thick steel studs make the rotary axis. It will be exposed to powerful loads from the wind, so must be powerful. The pin diameter shall be not less than 6 mm. part of the axis, which will be worn case with bearings, wrap the threads are not necessary, the main thing - to have enough length protruding to secure the vane to the stem with the nut. Similarly make the axis of the propeller.
3
Assemble the body, glue the wooden lugs for bearings and the axis of the propeller and keel. It is best to glue with glue EAF. Secure the glued part using clamps or powerful wood clothespins. Be sure to wrap the clothespins and glue with scraps of plastic bag, otherwise the pins will stick tightly to the body of the vane. When the glue is dry, using a drill drill a hole in a wooden boss under slewing bearings, and then make a hole for the axis of the propeller. Insert the axis of the propeller, and then dilute a bit of paint thinner and paint the whole body of the vane. Paint will protect the wood from moisture, and dissolve it is necessary for a deeper absorption into the wood. For best results, paint the body in several layers with intermediate drying.
4
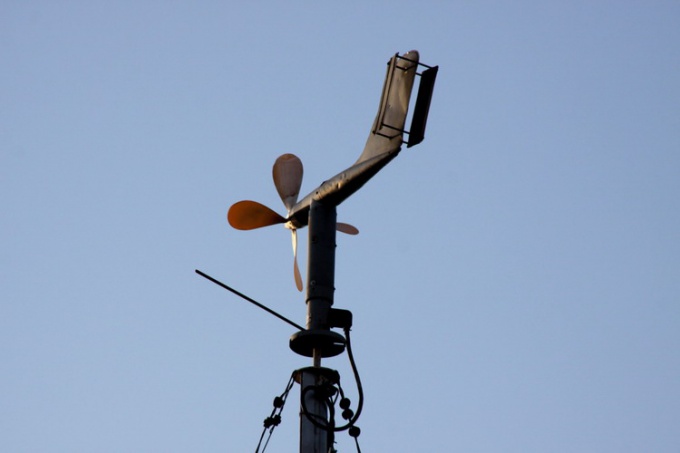
Make a propeller. The number of blades affects the appearance and complexity of manufacture. In the simplest case you can use a propeller of suitable size from a model airplane. Ridge ream the center hole of the propeller under the existing bearings and, if necessary, shorten the blade and insert the bearings into the propeller. After that, if possible, balance it. To do this, install the propeller on the vane, secure it with the nut and position the screw horizontally. If it rotates, then with emery paper grind a bit of material with the blades, which tends to go down.
5
Assemble the stand weathervanes. Take any handle of a shovel and drill at one of its ends a deep hole. Insert the pivot axle. When the glue dries, paint the rack and fit it finished weathervane. Secure it with the nut.
6
Balance the vane. To do this, using lead weights, get to the front or the aft did not outweigh the case in equilibrium is horizontal. Ensure that the vane will always show the correct wind direction.