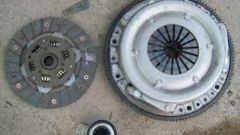
You will need
- - ruler or measuring tape;
- - Phillips screwdriver;
- - Vernier caliper.
Instruction
1
Turn off the car engine. Repeatedly press the clutch pedal with the engine off. Make sure there are no sticking, clicks, creaks, and other strange sounds. Note the gradual return movement of the pedal from the floor. If visual inspection is difficult, depress the pedal by hand into the floor and hold your hand during reverse movement, to feel the smoothness. Jerking the pedal when moving from the floor are a sign of a faulty clutch.
2
Take a tape measure or a ruler and measure the distance between the floor of the machine and the outer surface of the clutch pedal. Depress the clutch pedal to stop and repeat the measurement. If the pedal travel was more than 146 mm, adjustment is required.
3
Using a Phillips screwdriver remove the air filter. Pull the tip. Try to pull the clutch cable. A caliper measure the distance between the carrier and lever the plugs. The recommended distance value is 27 mm. If the measurement turned out another figure, adjust the distance with the leash. Loosen the leash threaded tip of the cable, achieving the recommended values.
4
Turn the leash on the threads of cable terminal and get the desired values. Repeatedly press the clutch pedal and repeat the measurement with calipers. If necessary, repeat the adjustment process.
5
Start the engine. If the clutch heard a howling sound, it indicates the wear of the release bearing of the clutch. With the engine off, disconnect the cable from the fork of the linkage and turning the plug clockwise, disconnect the release bearing from the diaphragm spring. The sound disappears – then release bearing is faulty.
Note
When you pull the clutch cable be careful. Too sharp and strong pull will cause deformation of the product.

