You will need
- - screwdriver;
- - Unsharp knife.
Instruction
1
Start removing the keyboard with the elimination of the top panel under the monitor screen. To do this, Unscrew the three screws in the section where the laptop battery. Turn the computer over, Unscrew one bolt of the rear cover.
2
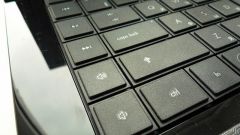
Pry bar, pry up the edges with your fingers or not sharp knife. While carefully otdelnie holders. Perform the operation with caution, as the holders made of a thick layer of plastic, rather than the whole panel - it makes it quite a fragile item.
3
Unscrew the remaining four screws with a screwdriver, carefully remove the keyboard. Try to perform the movement slowly so as not to damage the ribbon cables going from the keyboard to the motherboard.
4
Disconnect the keyboard ribbon cable. Be extremely careful - hold him by the base.
5
If you disassemble the keyboard for cleaning, use a vacuum cleaner with a tiny nozzle for hard to reach places. Turn on the vacuum cleaner in blow mode. You can also clean the keyboard and the gaps between the keys with cotton swabs. In General, the procedure itself clean keyboard is not simple. Complete disassembly with the removal keys Sony laptops are not recommended as fasteners inside quite fragile and have complicated construction. For these purposes, it is best to contact the authorized service center.
6
If you do decide to do it on your own risk, start full disassembly of the keyboard, starting from its upper part. Take a look at how fixed internal components of buttons, installed as a spring element. In any case don't lose any of the small parts, because to find the same replacement in the future, you are unlikely to succeed.
Note
Disassembly of the laptop deprives you of warranty obligations of the seller and manufacturer.
Useful advice
Before beginning the procedure, place the laptop on the carpeted surface, to prevent loss of fasteners.