Instruction
1
Find any cardboard for crafts. For box it's better to take the most rigid, dense, able to maintain shape and withstand a load folded into it things. For the cover, on the contrary, the ideal would be flexible cardboard. To compensate for its lack of thickness, it is possible to take two or three sheet and after cut out glue them together.
2
Directly on the cardboard, draw the pattern of the future trunk. Its base is a scan of a box without a top. Draw one large rectangle and divide it into three equal parts – the front and back walls of the chest, as well as his bottom.
3
On the sides of the Central rectangle pririsuyte the square whose side is equal to the height of the chest. Each of the squares will provide flaps that will help connect them with the front and rear walls during Assembly.
4
The lid of the product should be longer than the bottom of the trunkand 1.5-2 times the rectangle will need to bend while gluing. Drawing the sides of the cover (each of them a semicircle), you lay the cover shape and degree of convexity. On the valve side do the notches to their bases and remove every second the resulting fragment.
5
Cut out details breadboard with a knife. Do not have to try to penetrate the entire thickness of cardboard at a time. With a measuring device, hold the tip on the same line without much effort three or four times.
6
According to a cardboard pattern, cut fabric "upholstery" for the inner side of the chest. You can use any opaque material suitable in texture and pattern.
7
The perimeter of each of the sides of the chestand make ornate edges, using paperclay. Leave blank to dry at least 12 hours.
8
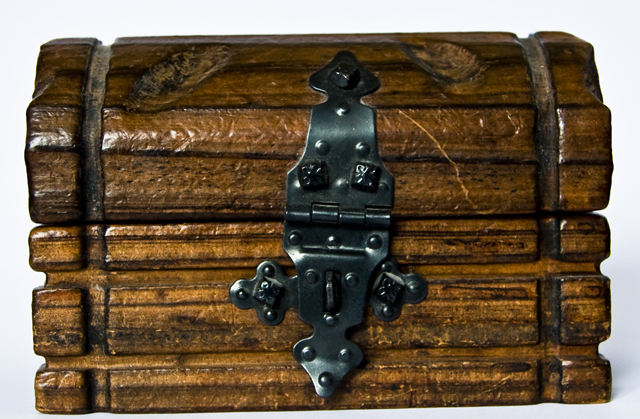
Paint all paper details. If they are large, use a roller or aerosol paint, otherwise suitable and conventional stiff brush (bristle or synthetic). Apply base coat light brown (first layer) and a dark brown acrylic. Then on the convex sides with a dry foam sponge, apply a Golden color. Touch it lightly to the surface of the paint, and the chestto the gold seemed to be worn down or chipped.
9
Paint over the entire area cover krakelyurnogo varnish. It forms small cracks, which will give things an antiqued look.
10
Glue on the inner side parts the fabric substrate, leaving not glued place, which will house the valves. Then collect all the chest and attach the final pieces of the material inside.