You will need
- 1. The original image of sufficient size.
- 2. The Program Adobe Photoshop.
Instruction
1
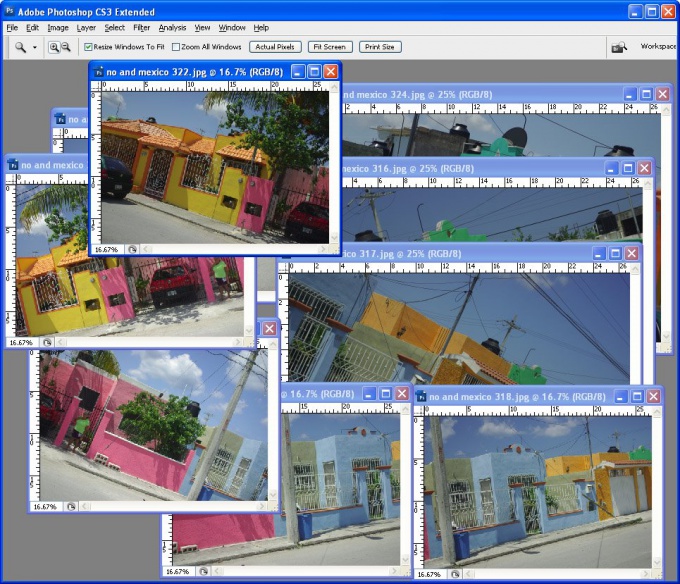
Open the image in Adobe Photoshop in the "File" menu, clicking "Open", choose your image.
2
Before reducing the image, it is necessary to edit by using the filter "Sharpen". Select menu "Filter", there is hover your cursor over "Sharpen" and click again "Sharpen".
3
Let's say you want to reduce the size of image to 200 pixels wide. In order not to lose the quality, you first need to reduce it by half (50%). In the menu "Image" click "Image size" then in the box that appears in the line called "Width", choose "percent", and enable set the percentage to 50 and click "OK". The result is the image size, for example, 300h400 pixels.
4
Now again edit the image with the filter "Sharpen" in the same way as before. Then you need to reduce the size to us (200 pixels), re-opening the menu "Image" - "Image size". In the line "Width" select pixels" and set the size to 200.
5
The last step is to use the filter "Unsharp Mask" designed to increase the sharpness of the photo. To do this, open the context menu "Filter", select "Sharpen" and click on "Unsharp Mask". In the window that appears you need to set values for the three parameters ("Amount", "Radius" and "Threshold". "Amount" means "power" , the higher the value the greater the clarity (try to kick 50%). "Radius" defines the zone of increasing contrast (exhibit 1.0), and "Threshold" follows the distinction between the "neighboring" pixels (enter '0').
6
It remains only to save the result. Click "File" in the main menu and select "Save As". Write the name of the file, and choose from the list of formats to save you need (most versatile - JPEG).
Note
In all cases, the question arises: how to change image size while keeping the picture quality? Today we will try to perform this operation in the famous graphic editor — photoshop (Photoshop). If you put a tick next to Resample Image then reducing or increasing the linear dimensions change photo size in pixels. Photoshop will automatically add or remove pixels from the photo that will inevitably affect the quality of the photo.
Useful advice
You probably once in your life needed to change the image size, zoom out, zoom in, tilt, round, zoom out and many other things without the help of Photoshop we can not do. Suppose your photo should be placed on the storefront, which is located in the image slightly at an angle. Showcase the picture goes away, that is, its two rear corner located farther and more closely spaced to each other than the front two.