You will need
- - threads for binding in the tone of the article or contrast;
- - the hook on the thickness of the thread:
- - spokes.
Instruction
1
The arm openings, zipper and cutout tight vest, bound to the spokes, you can tie the same instrument. As a rule, lower in this case, processing is not necessary, since these products usually start with a rubber band. Two main options. It's a double elastic band or rubber band with the ACC. Select the desired.
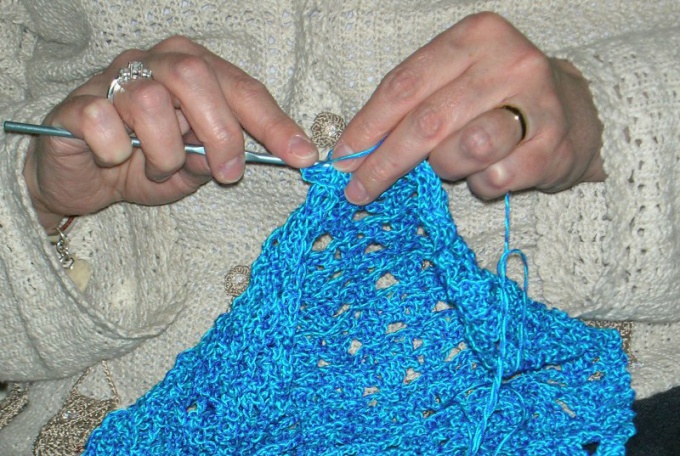
2
Double gum is usually applied on vestx without buttons, there is no need to do the loop. Dial on the spokes with fishing line a number of edges, starting with one of the bottom corners. Secure the working thread. Enter needle in first loop boundary "pigtails" and pull out the thread. Pull so the loop around the edge. Don't forget to monitor the symmetry.
3
For dual bands number of loops on the needles should be twice larger than normal. If you get double the amount directly from "braids", the connection will be pretty hard. Therefore, pull from edges, hinges strictly on the length of the line which should be handled, and in the next row dolerite others, vymazyvaja them in the gaps between the loops of the previous row.
4
Very double knit elastic band in the following way: remove edge, 1 front loop, 1 take nepovezane, leaving the working thread in front of loop. The following rows knit pattern – front on front, purl shoot. The thread should be between the layers. In the last row provarite loop in pairs, and then close them. The openings in this case are obtained with a seam that is better to place the bottom.
5
The second method is to run the bar, collar and armholes cross knitting. Similarly, the dial loops of the "braid". Double the quantity you at this time is not required. Davaite bar to line the holes for the buttons. For them, close at intervals of several loops and number of their dolerite. Knit this way for the strap width. Provarite one row purl on the front side to the fold. The remaining part of the bar do right and making the right place the second row of holes. Tie the free end of the strapping to the "pigtail" on the reverse side of the product.
6
The openings in this case can be knit on circular needles. They will work without a seam. Type of loop is exactly the same as described in the first method. Follow the rubber band to the width of the strapping, then provarite wrong number of loops on the front side, and then the second part of the canvas. Sew free edge to edge of armhole.
7
An openwork vest, tie, and hook. This is especially necessary if it is linked from separate motifs. In this case, you must handle and bottom. It is best to tie a vest on the perimeter. Attach yarn in the corner between the lines of the bottom closure. The end of her route over the existing loops, then it will be under the bars.
8
The first row tying run regular columns – simple or with one nakida. Try to position them so that the edge of the vest was not pulled. At the same time should not appear, and assemblies. Tie the vest around the perimeter.
9
From the second row you can start to dream. The easiest option is to make another couple of rows of the same columns. But for a Lacy vest the fit and cloves. For example, proverite on the second row 2-3 column, and on the next group make the arc. Alternate columns with arches. The next round promazyvaya column in columns, and arches – columns with nakida. Finish the binding of a set of simple columns. Armhole tie the same pattern.
10
To vest the fit and the cross lace, crocheted. Tie a chain of 5-6 loops. Make 3 loops to the side of the arc. Pass incomplete "eye" in one of the loops edge. The following rows knit column in a column, do the sides of the braid loop. Those that are located closer to the edge of the product, attach to the edge of the shelves, bottom, or neck of the vest. You can tie the braid on the entire length and then sew it over the "ears" to the product.